
Introduction to Linux
What is Linux?
Linux is an open-source operating system that rivals Microsoft Windows and Apple’s macOS. I mean, 70% of ALL servers worldwide utilize Linux. Linux does not have as much bloat or extra baggage compared to the other two operating systems, which in turn saves precious hardware resources on the machine you are running it on. That’s exactly why we’re diving into Linux!
First, we need to install the actual operating system onto our machine. There are multiple ways to do this (virtual machines, cloud instances or even a PXE boot over the network), but the method we’re employing today will be using a bootable USB drive and Rufus (though other tools besides Rufus work just as well). Now, we can have a dual boot machine where we split our drive to contain both the Windows OS and Linux, or just downright overwrite our Windows portion and just run Linux only. With dual boot on a single drive, both operating systems share the same physical disk on different partitions. Each time you start the machine, you’ll be taken to a bootloader which allows you to choose which OS to load. This only works if Linux was installed last, as GRUB gives you an option to choose which OS to boot into. If Windows Boot Manager has priority, you’ll boot straight into Windows automatically since it doesn’t offer a menu to select other operating systems. There are also some other risks here: a Windows update can overwrite the bootloader making it difficult to boot into Linux. If you wanted to resize the partitions in the future, you could potentially corrupt data. You could also just run out of space in either partition, and lastly, if the drive fails, you’d lose both operating systems. So I think we’ll go with overwriting our Windows for this project.
If you have two separate drives, you can install each OS on its own drive, giving you cleaner separation and no worries about one failure taking out both. You can select your boot drive via BIOS or let the boot loader detect both.
Now that we know what we’re going for – let’s download the latest version of Linux Ubuntu. We’re going with the Debian family. The other main option (although there are more) is Red Hat which contains Fedora, etc. We’re going to download the Ubuntu OS onto our USB drive.
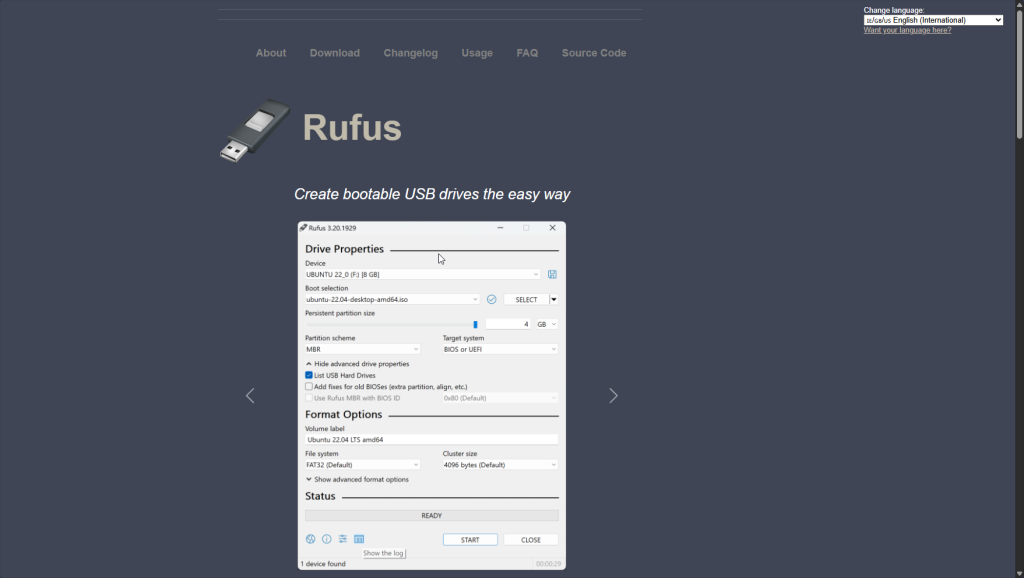
Now, we go to https://rufus.ie/en/ and download Rufus itself as shown in the image above. Rufus allows us to create bootable USB drives, so when you plug it into your machine, your machine boots from it instead of your disk!
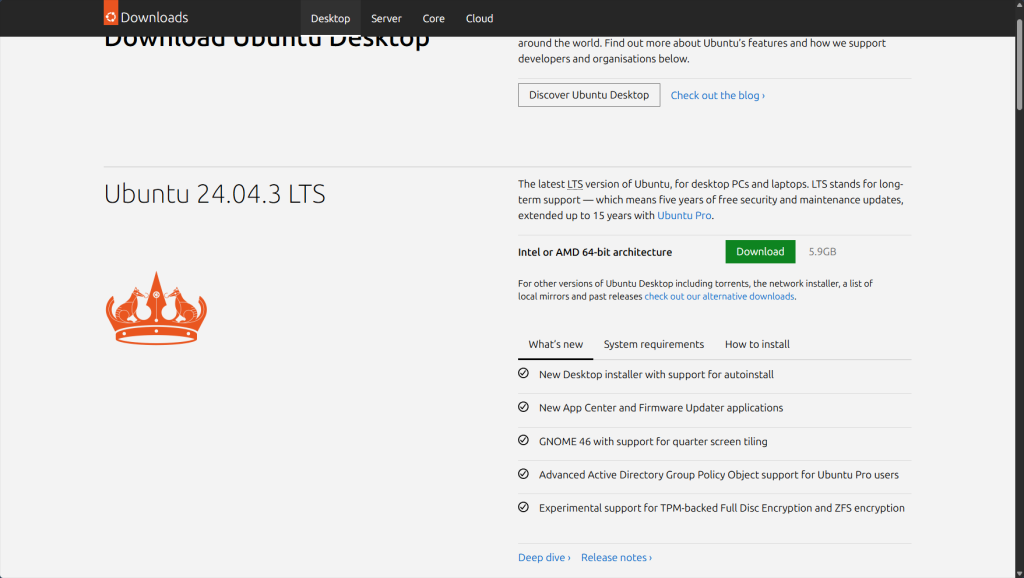
Then go to ubuntu.com and search for the latest Ubuntu ‘LTS’ (Long Term Support) version and download it!
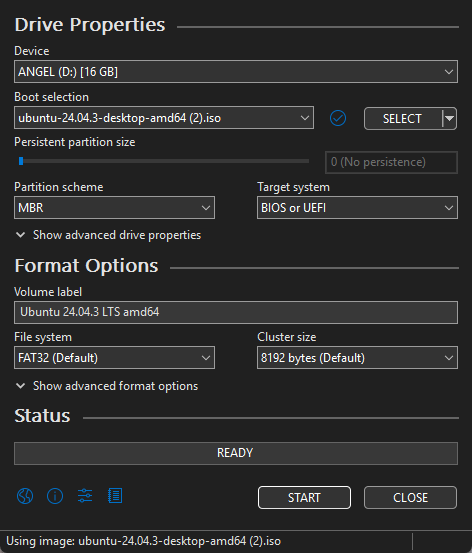
Back into Rufus, find the ISO image you just downloaded of Ubuntu and prepare to click ‘Start’ at the bottom. WARNING: When you reformat a USB, ALL data within it will be permanently deleted. Ensure nothing important is on the USB. After this process is complete, your USB is now a bootable installer. It is used as a medium to allow your system to install Linux.
Restart the PC you want to install Linux on, and enter the boot menu by repeatedly clicking “F12, F2, or DEL” depending on your PC’s manufacturer. Select the USB drive, run the Linux installer, follow the instructions, and install Linux onto your internal drive. Here, you can choose to overwrite the Windows partition or dual-boot both operating systems (remember what we discussed earlier). The installer will install Linux and GRUB (the boot loader Linux uses) to the internal drive, so your machine automatically boots into Linux when you turn it on in the future.
Success! We have Linux and only Linux installed on our laptop. Linux is an operating system where most of the work is done through the shell (essentially a command line interface). It is pivotal to learn the syntax of Bash to be successful and make using Linux more efficient and easier.
Let’s go over some of the most popular commands we can use.
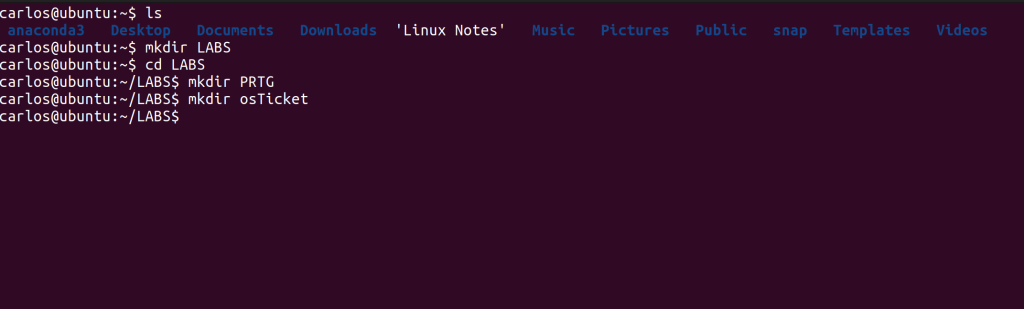
Right off the bat, we’re starting with the “ls” command, which lists all of the folders, files and directories within the system. Please note that the location where you input this command matters! On the first line of my CLI, you can see after my hostname (carlos@ubuntu), it shows “~$”- this signifies that I am currently in my home directory! The home directory is my personal user space where my documents, downloads and configurations are in. To find the umbrella for all directories, you’d need to be within the root directory, showcased by the symbol ‘/’. Since we’re in my home directory, all of my personal sub-directories appear here. If I were to change my current location to the ‘Documents’ folder and input the ls command from there, ONLY the files/folders within Documents will appear as shown in the image below where I did it for the LABS folder. To better explain root and home directory: the home directory is like going to a user’s folder within Windows File Explorer (C:\users\username). The root directory is equivalent to the C:\ drive.
In that first photo, we also utilized the command “mkdir” which creates directories (folders). With this Linux machine, we’ll be doing two projects: utilizing PRTG for network monitoring and osTicket to understand ticketing systems more in depth. Therefore, we created a new directory called LABS. Notice how I used the command “cd” (change directory) to change my location from the home directory to the LABS directory.
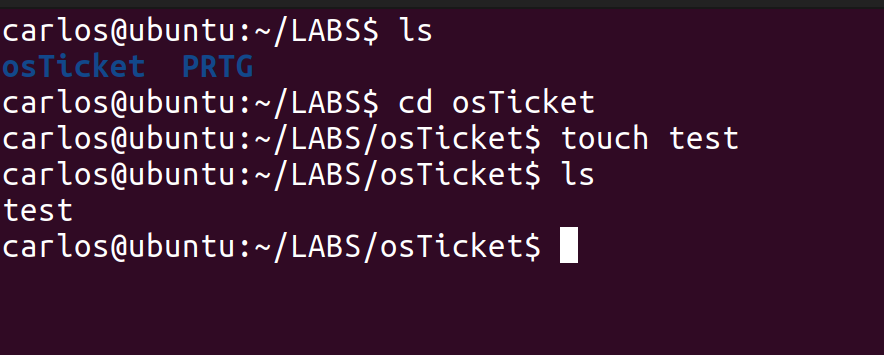
In the image above, we created a file called “test” using the command “touch” within the osTicket directory. The touch command allows you to create an empty file if it doesn’t already exist.
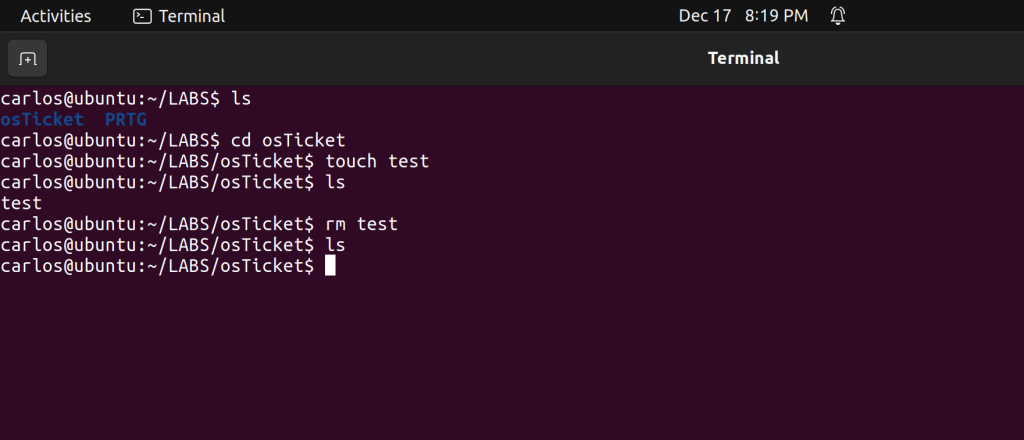
In the image above, we deleted the same file we created using the command “rm”. However, this command can also delete directories. As a safeguard, Linux forces you to include the ‘-r’ flag (recursive) to delete all of the contents within the directory. For individual files, this is not needed. (add a pic for this with error).
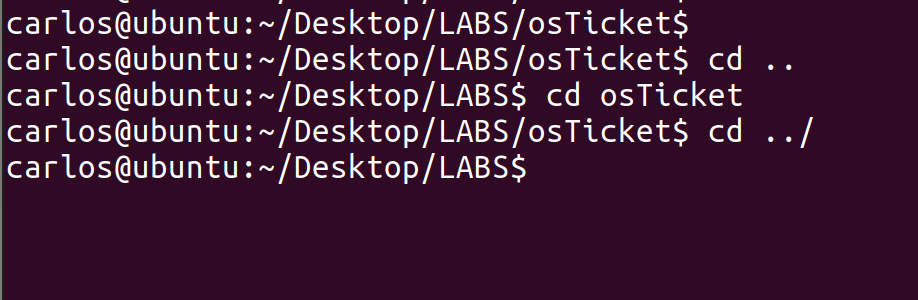
./ = current directory. Linux does not read minds, so when you run a command, it ALWAYS checks the current directory first. You must use ‘../‘ to LEAVE the PRTG folder and go to the parent folder (LABS). If you wanted to go to the parent of LABS, you’d need ‘../‘ twice (../../). If you wanted to go all the way back to home, you’d need to use ‘../’ three times (../../../)-in this case because the file path is Home/Desktop/Labs/PRTG – or you can use ‘cd ~‘, or simply ‘cd‘. In Linux, “~” = home.
The ‘-‘ symbol takes you back to where you were previously. If you don’t want to play around with symbols, you can just type out the ENTIRE file path to whatever destination you want to go, as shown above where I traverse from my home directory to the PRTG directory. Also note that Linux is case-sensitive – you must type filenames/directories EXACTLY as they appear.
Another note is that when you are traversing DOWN (i.e going from the home directory to a subdirectory) you do not need the ‘../’ symbols because Linux is able to see the subdirectories. You can just input cd ‘next directory name’. However, if the directory you want to go to is not directly below your current directory you must explicitly name them as if you were typing the file path. The ‘../’ syntax is only necessary when you’re going UP the directories (going from a subdirectory to a parent directory).
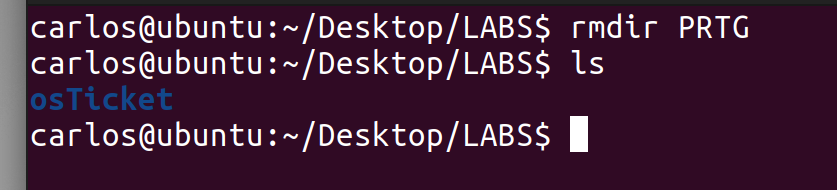
Another command you can use is ‘rmdir’ as shown above. ‘Rmdir’ only deletes empty directories – if there are files within the directory, you’d receive an error. To delete a directory with content inside, you’d have to use ‘rm -r directoryname‘. ‘Rmdir’ and ‘mkdir’ ONLY work for directories, they do not work for files!
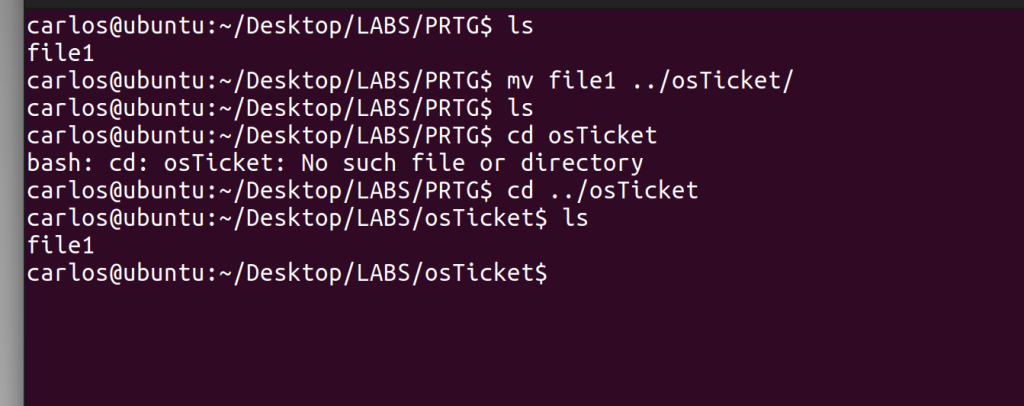
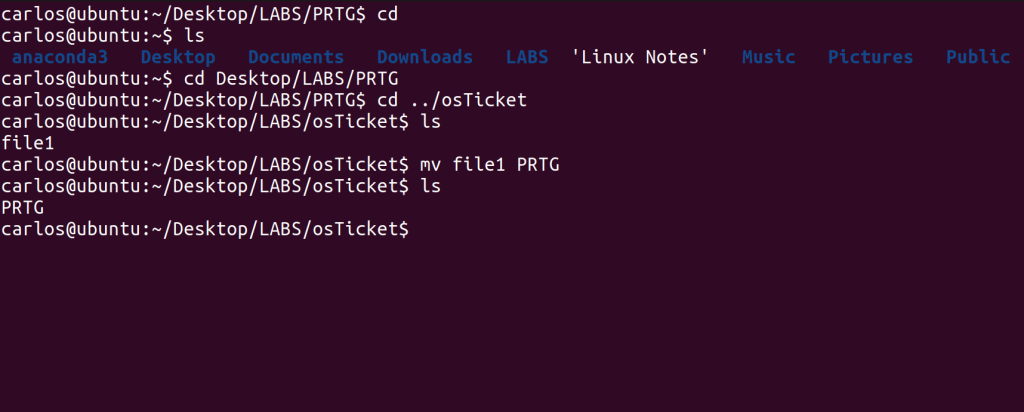
In the above image, we showcased the “mv” command to demonstrate how we can move a file from one directory to another. Now, it is vital to use what we previously discussed about changing directories with this command. Depending on the location of the destination folder/directory, if you don’t explicitly state how to get to that directory, Linux will look at your target file/folder and just rename it to whatever your “destination” was.
Additionally, you can see from the screenshot how crucial the ‘../’ syntax is – I tried to change my directory to osTicket, which is adjacent to the PRTG folder, but Linux couldn’t find it. I had to get “out” of the PRTG folder to its parent, LABS, so that Linux could find the osTicket folder. There, you can see that the “file1” folder was moved there successfully and was no longer in the PRTG folder.

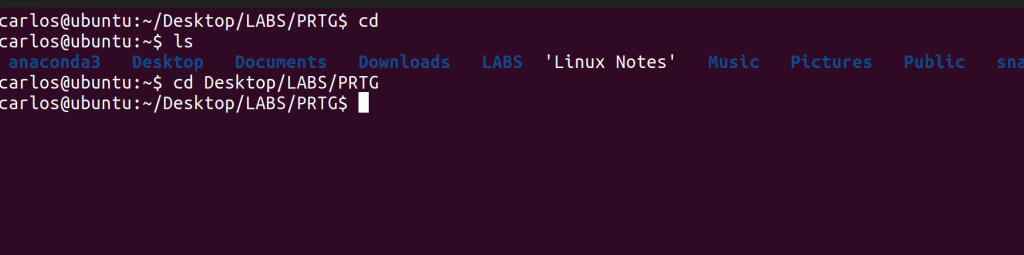
In the above image, I demonstrate what we discussed earlier. I used the “cd” command to go straight to our home directory and spelled out the entire file path to the PRTG folder to change directories quicker. I tried moving the ‘file1’ file back to the PRTG folder without the proper syntax, and you can see that the command actually just renamed the file to “PRTG”.
The “find” command is a crucial command within Linux. Here I am am able to find whatever files I am looking for throughout the whole system, making it an efficient tool to locate any files I need. This command has many parameters you can input to distinguish each search, making it more specific or broad.
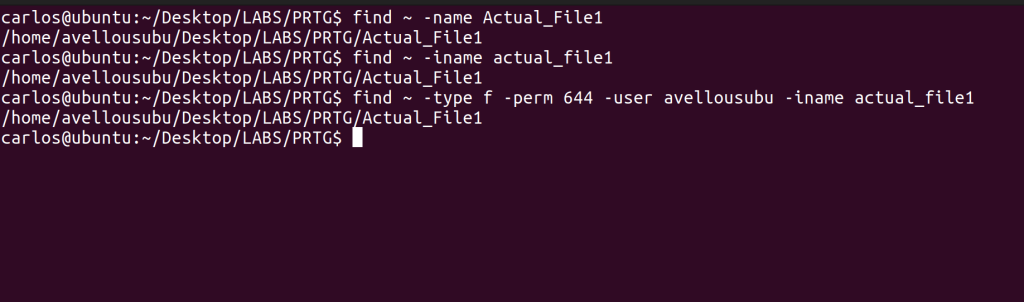
In the image above, we can find a file using “-name” – however you have to spell the file name EXACTLY as it was saved as or else nothing will be found. With “-iname” however, capitalization does not matter – Linux will try to still find the file or directory for you as long as the file is spelled correctly. I used the “~” symbol in the beginning of each command to ensure the command starts its search from the home directory, and then works its way down. If I used the command and I was not in the right directory nor did I give it proper instructions on how to look for this file, it would not find it. However, if you know the general area of where the file is, you can narrow the search and the process will be significantly quicker.
With the find command, you can combine multiple parameters together to make the search as specific as possible. Notice how I combined the parameters of “-f” stating that I am looking for a file and not a directory, “-perm 644” (more on that later but it is about permissions), “-user” (where the owner of the file had to be me) and then also used -iname.

Another extremely important command is “sudo” or ‘super user do’ which is exactly the same as administrative privileges in Windows. To change the permissions of a file, you need to be in ‘administrative mode’ so I used ‘sudo‘ to input the ‘chmod‘ command in the image above. The “chmod” command allows you to edit the file permissions which correlates directly with the ‘-perm 644’ parameter we used when discussing the find command.
So let’s dig deeper into this breakdown. Linux uses a number system for assigning privileges to files. The ability to read a file is equal to 4. To write to a file, 2, and to execute a file is 1. If you add them all up, you get 7, which means you’d have all possible privileges for a file. Someone with only read and write privileges would be 6. Next, when changing the permissions of a file for certain users, the numbers always represent the same order: owner of the file, group, and everyone else. So, regarding the above image, 644 means that the owner of the file has read/write privileges, the group that can access that file only has read privileges and everyone else only has read privileges. Since this is a non-executable file, Linux did not allow me to change the permission for the owner (me) to 7.
If you wanted to see the ‘details’ of a file, you use the command “ls -l” with the filename. You can see the privileges of each subset that I mentioned (owner, group, etc.) but with letters instead of numbers, rw-r– etc. You also see the owner of the file, the date the file was created and the name of the file.
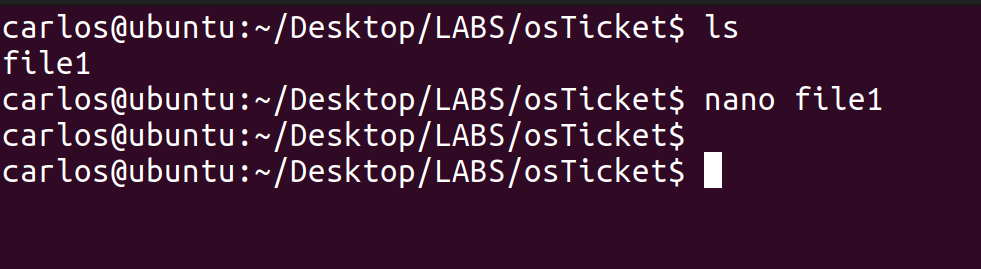

The “nano” command allows you to edit any file and add text to it. In the two images above, you can see me using nano on file1 to write a sentence into it when it was previously empty. Nano will open any file you use it on, but if the contents are binary (images, executables, etc.) it will just look like gibberish -though it won’t break anything in the file.
Note about file extensions in Linux: they are not necessary the way they are in Windows. In Windows, if a file is not an .exe, it will NOT execute! If the file does not end in .txt, you cannot write text to it. In Linux, this does not matter whatsoever. A .txt file can actually be executable! Or it can not have an extension and just be called file1.
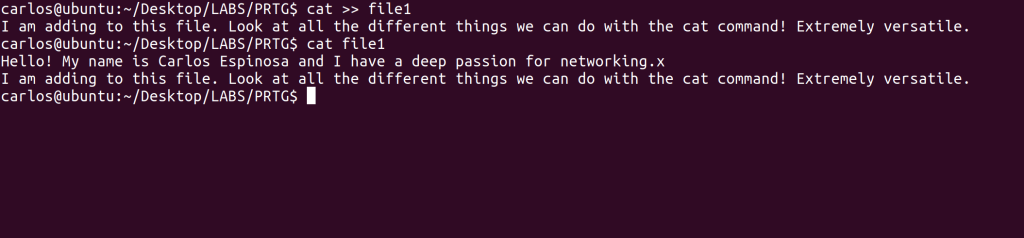

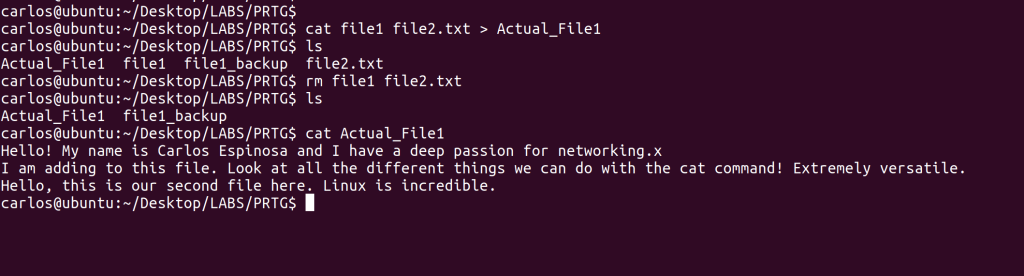
“Cat” which stands for concatenate, is an extremely important command that you’ll use consistently within Linux. This command is multi-faceted with various uses. Looking at the first image above out the of four, you can append things to whatever file you’d like. Notice how I added a second sentence to the file. You must the ‘>>’ syntax for this function. You can theoretically append any file’s contents (instead of manually typing text), however, it only makes sense to do so with text-based files because binary data (like images) would result in gibberish. In that same image, if you use the command (just the word cat) with the file name, it displays the contents within the file, which is its second function! You can see it display the new content I added with the same command.
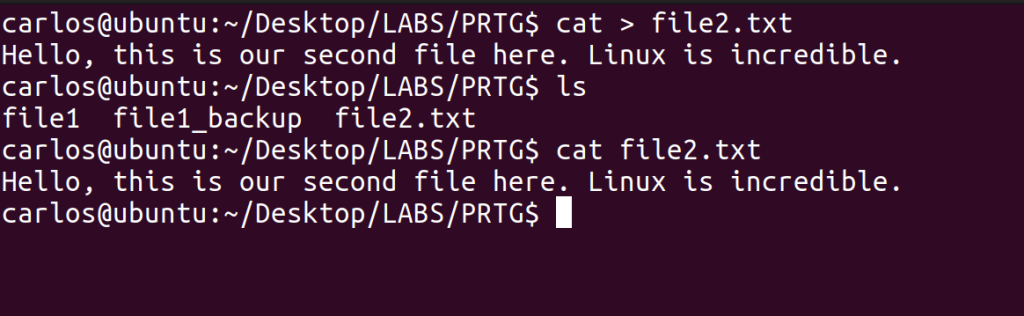
Another trick with cat is that you can create files instead of using touch. In the second image above, notice how I created the file2.txt. Cat can ALSO show the contents of multiple files simultaneously as shown in the third image! Using ‘cat file1 file2.txt’ I was able to see the contents of both files.
In the last image above, you can see that another of the command’s functions is to combine multiple files into one, and you’re able to name that file to whatever you’d like. You must use ‘>’ for this ability. It does NOT delete the individual files that were combined. I also used cat to verify that both files’ contents were in the newly created one.
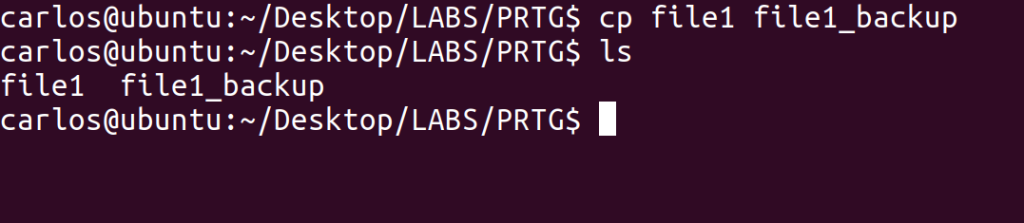
Another key command is “cp” or copy. This command works exactly like the “mv” command, but instead of only having one iteration of the file you are ‘moving’, the copy command leaves the file in the original location AND the destination location – hence the “copy” name. It also has the same ability of renaming a file the way we can with the mv command as shown in the first image above. We renamed file1 to file1_backup, but file1 still remains. You typically wouldn’t use copy for this kind of task.
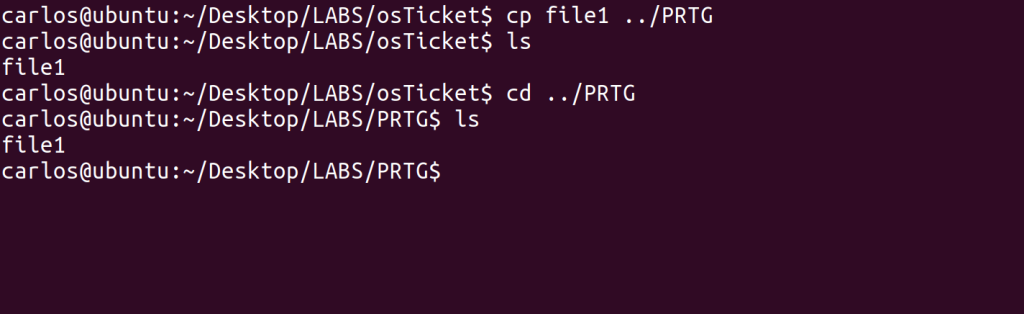
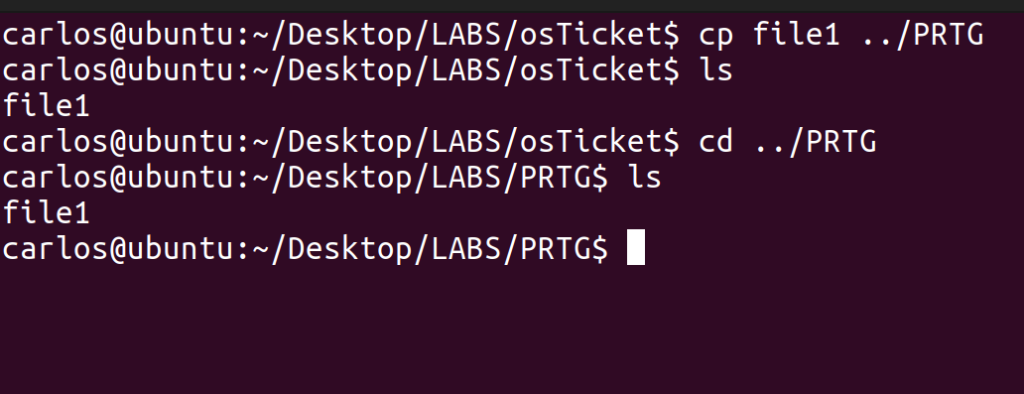
In the second image, you can see me copy file1 so it appears in both the PRTG directory and the osTicket directory. Notice how I have to guide the system by informing it that it must go up one directory to the parent LABS to be able to find PRTG using ‘../’.
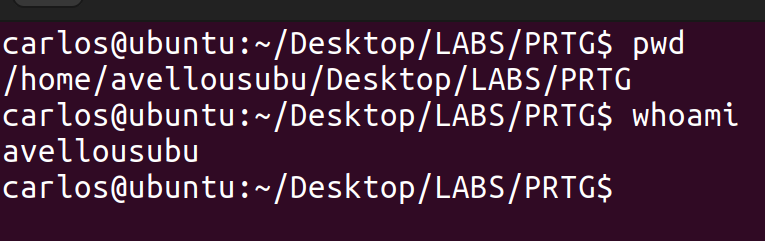
“Pwd” is a useful command that tells you exactly where you are by displaying the entire file path. If you look at the image above, before using pwd, the Linux CLI did not give me the full detail of where exactly I was or what user I was logged in as. To know what user you’re logged in as, you would use “whoami”. These commands are vital so you do not delete a core file/directory by accident, or use the wrong user’s privileges without realizing it.

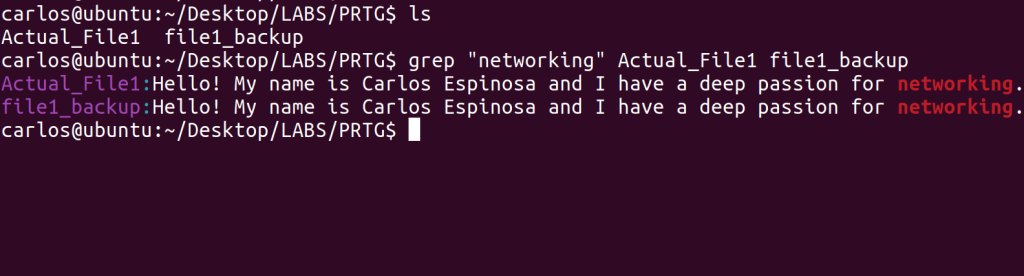

The last vital command that we’ll learn today for Linux is “grep.” Grep functions exactly like CTRL F in Windows. We use this command to search for text within files. In the first image above out of the four, notice how I am looking for the sentence that contains the word “networking” within file1. Like most other commands, I can explicitly tell the system where the file is to make the process significantly quicker (if I already knew the location of the file).
You can also grep multiple files simultaneously as evident by the second image above. I was looking for any sentence that contained “networking” within two specific files and it gave me the sentence output from both Actual_File1 and file1_backup. So just like “CTRL F” on Windows, you’d use this if these files had a large amount of text within them. The third image just showcases how the system highlights your keyword in red when you are trying to find it through grep.
Additionally, you can use grep to function just like the find command but instead of searching by file type, name, etc., you’d use a keyword within said file as seen in the fourth image above. You can also combine multiple commands together with grep to create an extremely specific search. Let’s say you are looking for a specific file that contains a certain keyword but you do not know where it is located. In this scenario, we’d use both the find and grep commands to find this file as well as that specific keyword in that file as demonstrated by the fourth image above.
This is the end for the essential Linux CLI commands! A lot of ground was covered here – from navigating directories to creating them, deleting files/folders, viewing and combining contents with cat, searching for files and/or keywords and much more. This is just the foundation. Linux has a lot more to offer, but mastering these commands gives us a well rounded toolkit to navigate, manage and troubleshoot most systems I would probably encounter.