Active Directory Lab 3 – GPOs, Service Accounts, Permissions
In our final Active Directory lab, we’ll showcase the power of GPOs and enterprise file management. We’ll set up shared network drives deployed through Group Policy, use File Server Resource Manager to control storage, configure folder permissions, implement access-based enumeration so users only see what they can access, and create service accounts to run services with limited, specific permissions.
Shared Network Drive
Will be mapped to all domain users using a GPO.
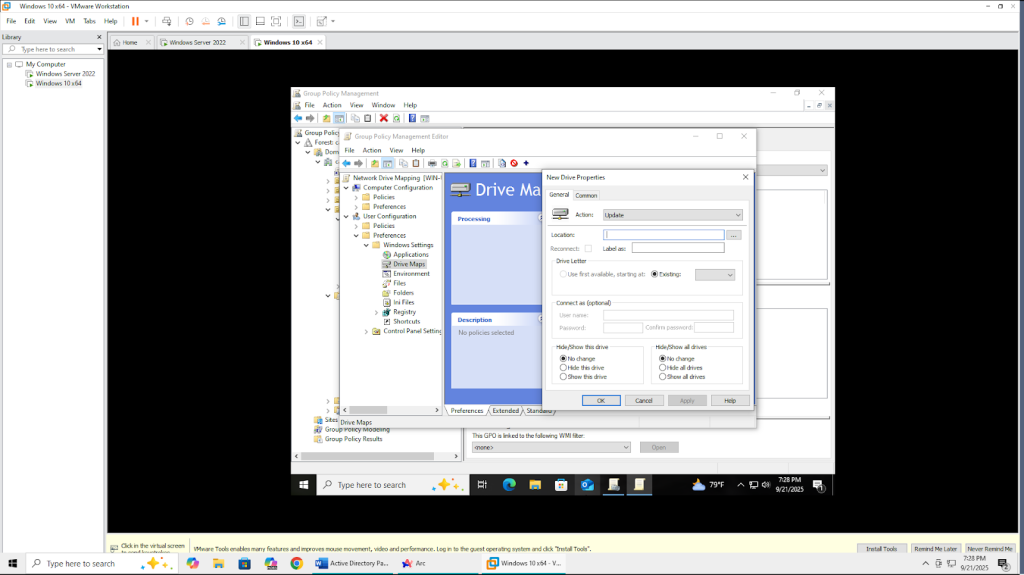
- This GPO would be under User Preference -> Windows Settings -> Drive Maps. The first thing it asks for is the location (file path) of this network drive. But before we jump into the GPO configuration, let me show you why using GPOs for this is critical instead of manually mapping drives

- We need to know the actual hostname of the server to be able to correctly input the file path. So, in the command line we used the command “hostname” on the server.
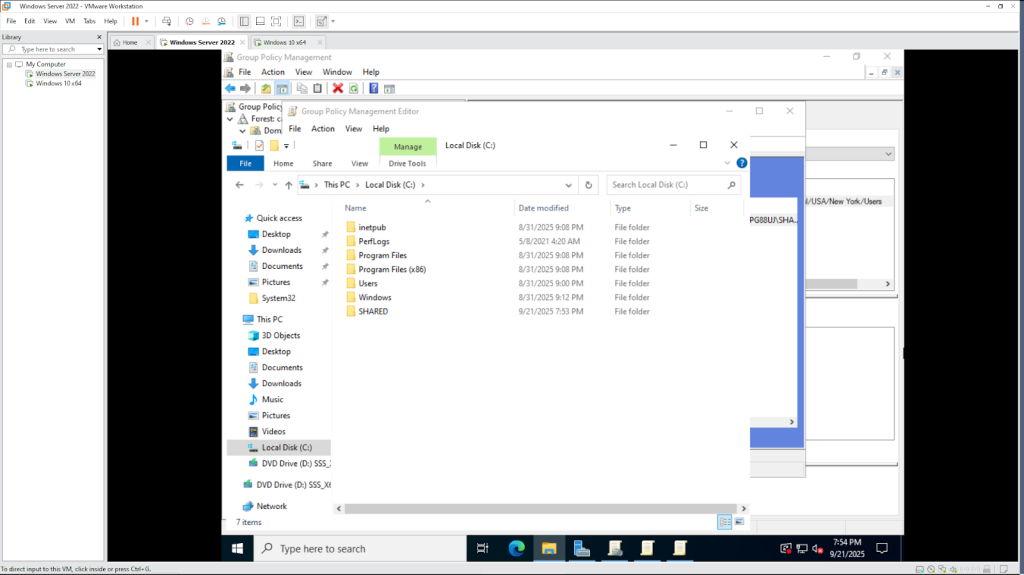
- Then, in the File Explorer, right click the empty space and created a new folder named SHARED.
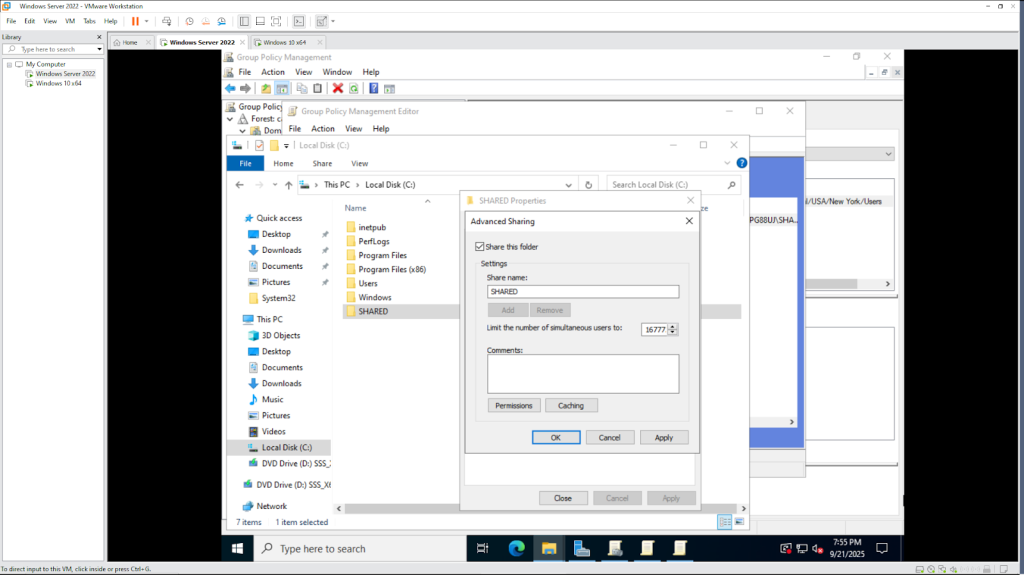
- Share the folder with the network and look at the two different kinds of permissions available directly on the folder.
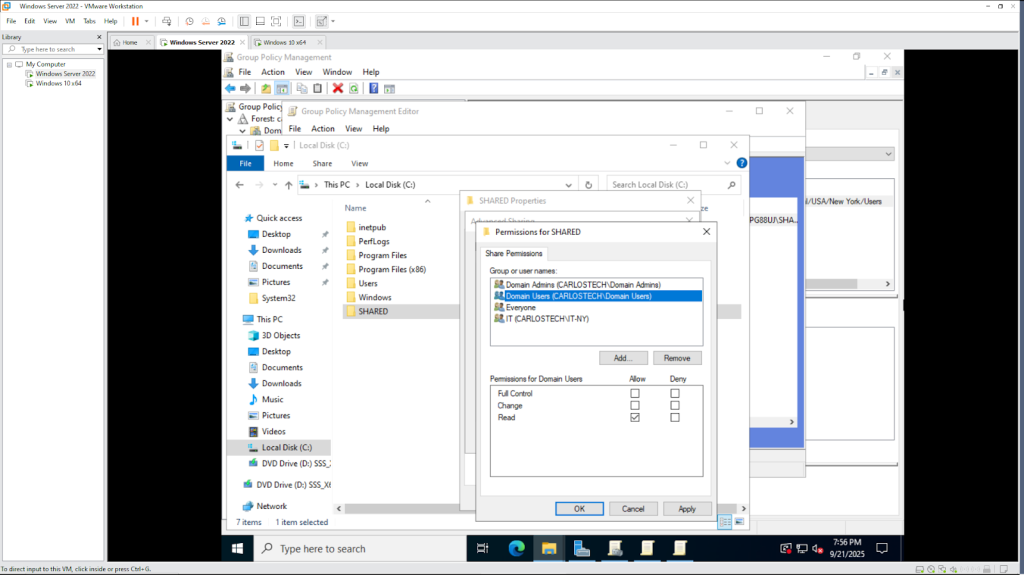
- Notice that you can add users and groups, and configure their permissions for this folder. However, these Share permissions are extremely basic as there are only three options:
- Read – view files only
- Change – read and modify files
- Full Control – complete control over the share
- These Share permissions only apply when someone accesses the folder over the network. They don’t affect someone sitting at the server itself.
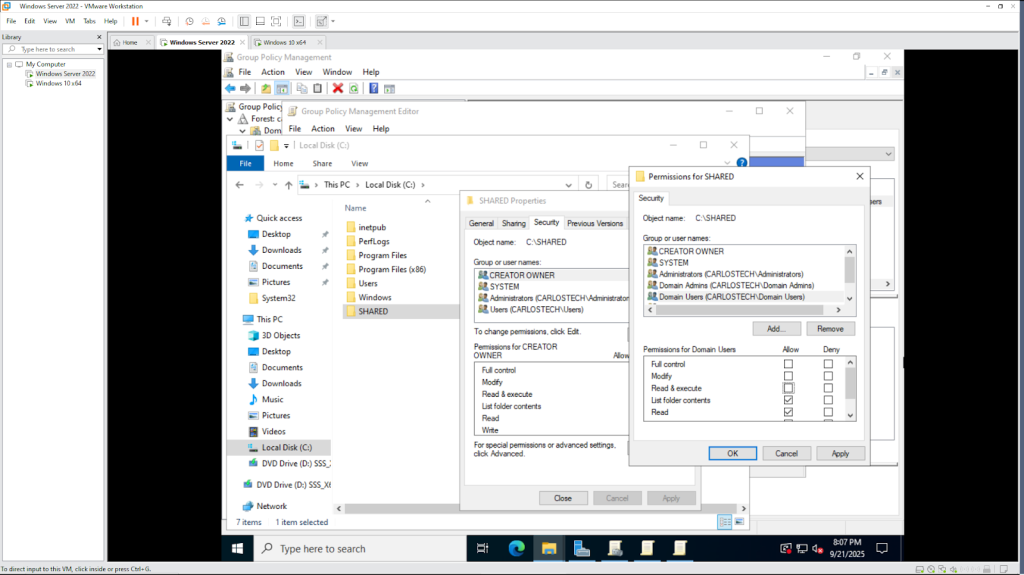
- To configure more granular permissions, you need to use NTFS permissions found in the Security tab. NTFS permissions:
- Apply both locally and over the network .
- Offer much more control.
- Can be set on individual files, not just folders.
- Are what you’ll use most of the time for real security.
When accessing a shared folder over the network, both Share and NTFS permissions apply – and the most restrictive permission holds priority.
We shared the folder over the network and established the permissions. Peter is under the group “Domain Users” so he should have read rights and have access to the folder over the network.
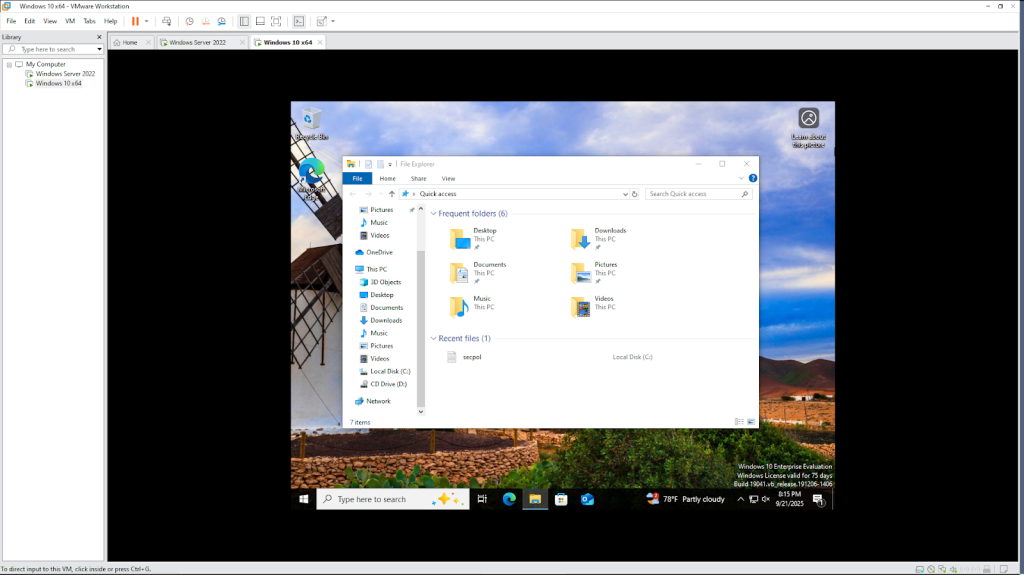
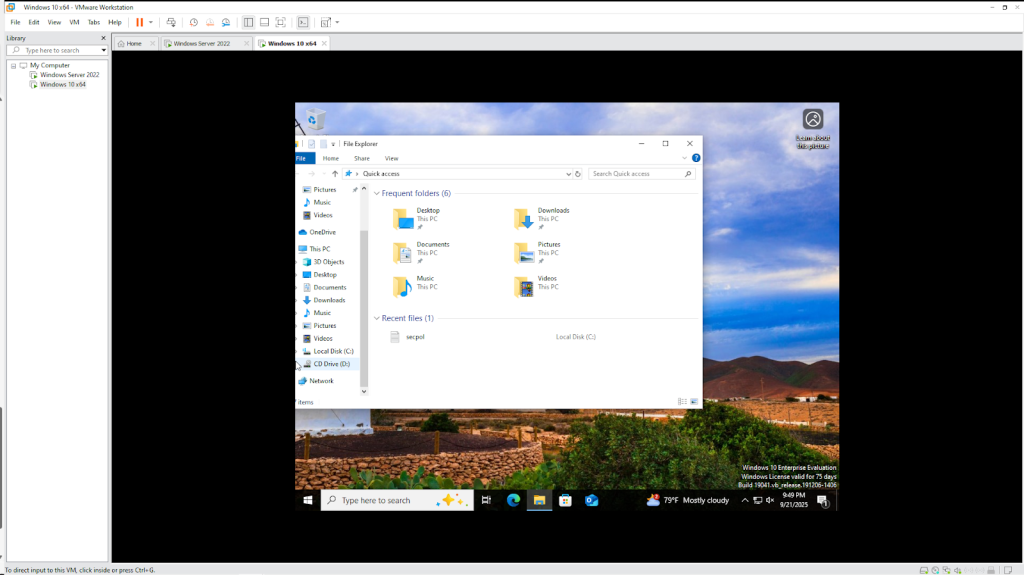
- As you can see, the folder does not automatically appear in Peter’s File Explorer. That is because sharing the folder is only making it available over the network – it isn’t pushed to users automatically. This works exactly like a public library – the book (file) is there to access but you must know where to look for it.
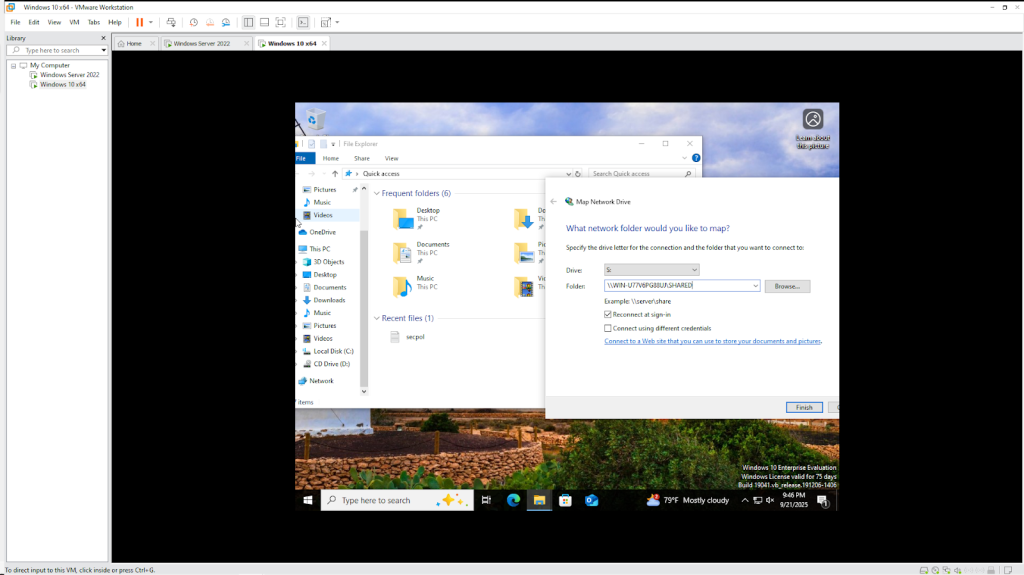
- The first option you have is to manually map the drive to the user profile as shown.
When mapping drives manually, you have to:
- Input the file path for every single user.
- Visit each user’s computer (or remote in).
- Make sure to check “Reconnect at sign-in” so the drive persists after reboot.
You can clearly see how tedious and time consuming this would be to configure at mass scale – which is why utilizing Active Directory and GPOs is crucial. I disconnected the shared drive from Peter’s profile to see if the GPO we’ll create now works.
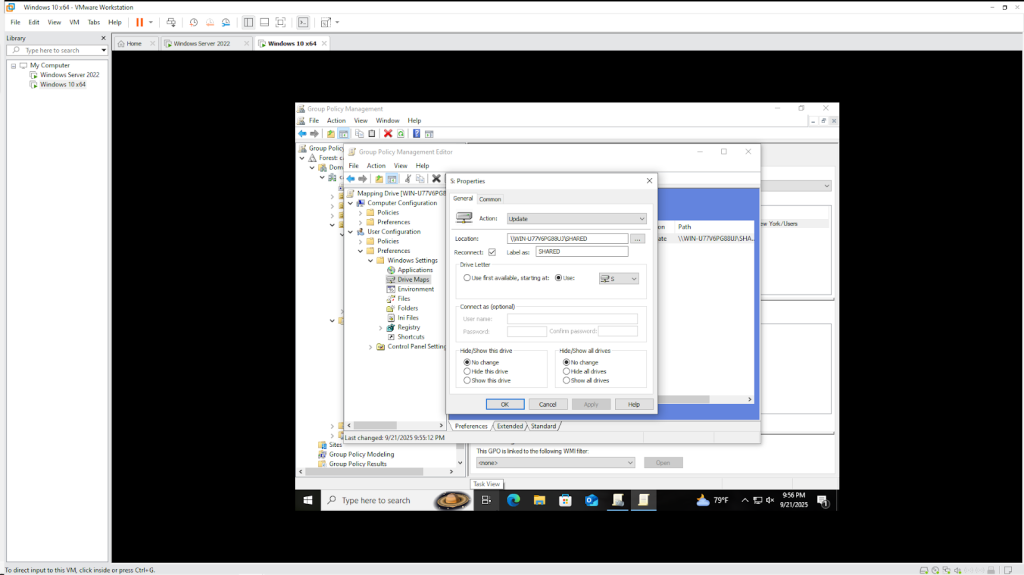
- We created the GPO as explained before and linked it to the New York Users OU.
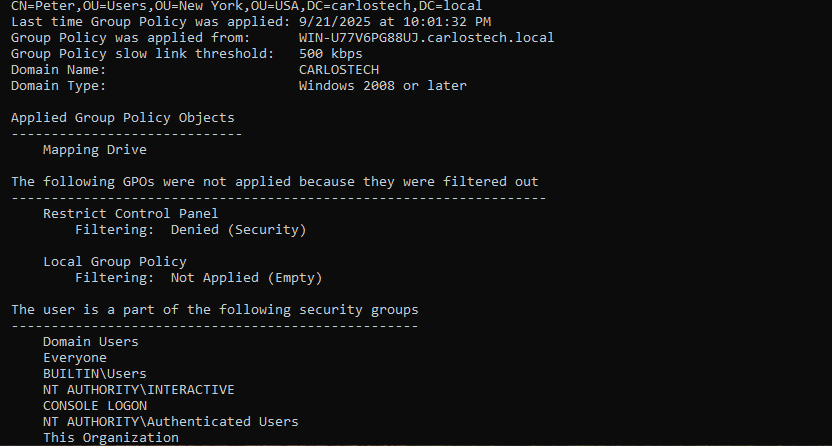
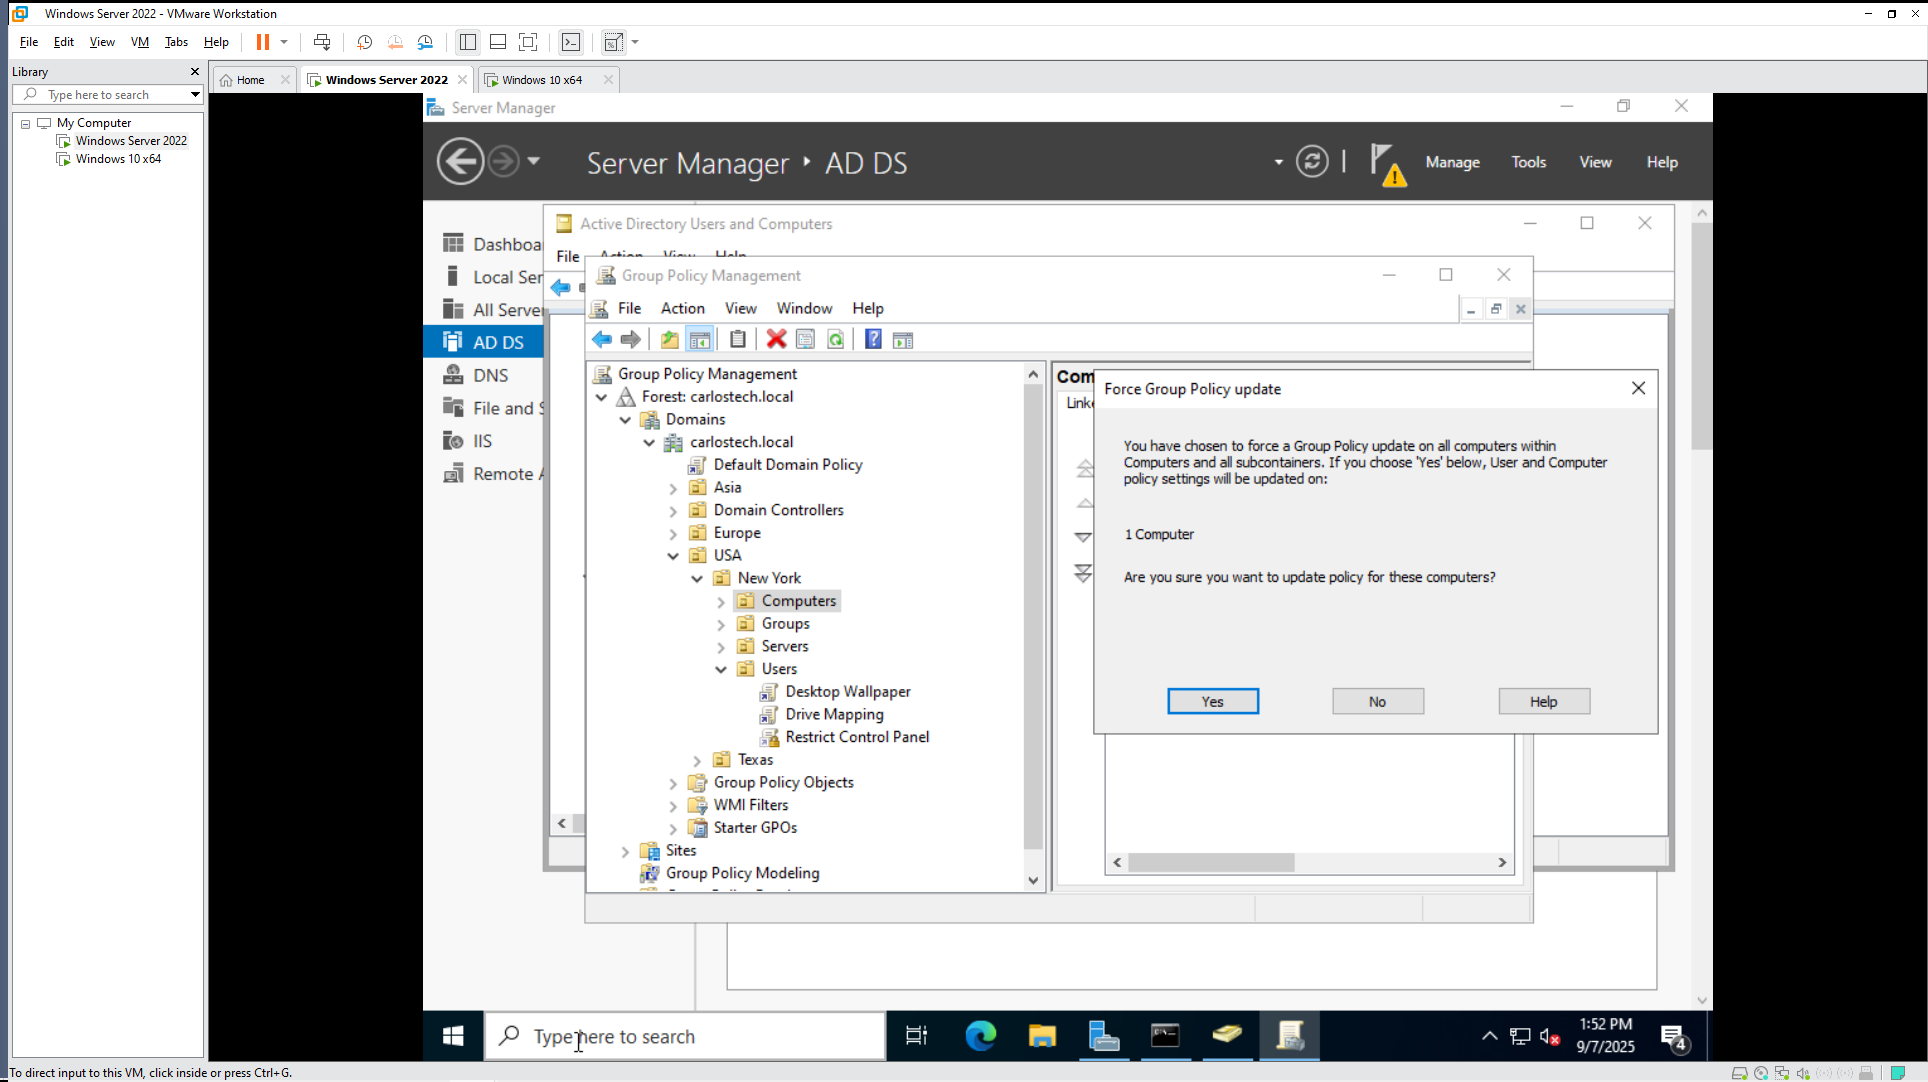
- Let’s sign into Peter’s user profile and force update the GPO using the command line. I also checked all of the GPOs applied to Peter’s user account using the “gpresult /r” command.
- You can see that the ‘Mapping Drive‘ GPO we just created was applied to his user profile. You can also see how the ‘Restrict Control Panel’ GPO was not applied to him from our previous AD project due to security filtering.

- The shared drive is now mapped to Peter’s File Explorer again.
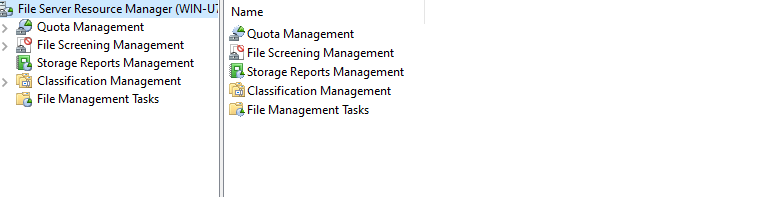
File Server Resource Manager
- Now that we have our shared folder working, we need to manage it properly. What if users start storing massive video files? What if someone uploads executable files that could be malicious? How do we control storage usage? The solution to all of these questions is utilizing File Server Resource Manager, which has these capabilities and more:
- Set storage quotas (limit how much space users can use).
- Block certain file types (like .exe or .mp3 files).
- Generate reports on storage usage.
- Send email alerts when quotas are exceeded.
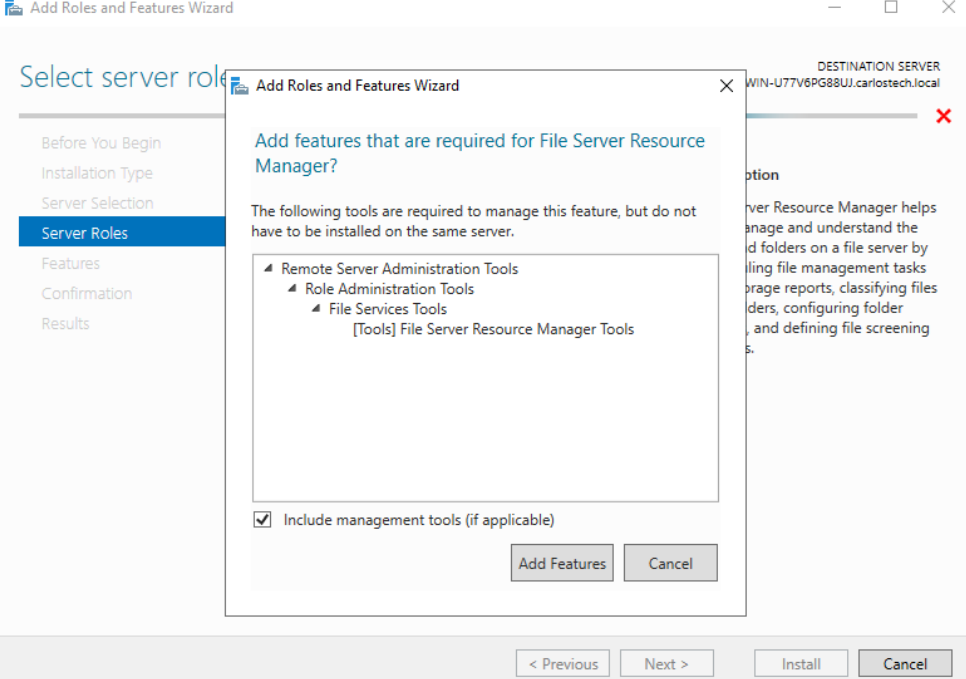
Our AD server doesn’t have FSRM installed by default, so let’s add it now.
- You should configure your server remotely as much as possible using RSAT – which is a standard security posture. However, the File Server Resource Manager Tools were not working on my remote admin computer. After some troubleshooting, I discovered that the Filer Server Resource Manager was pointing to the local machine instead of the server, and when I tried to point it to the server, the firewall on the server itself was blocking the connection.
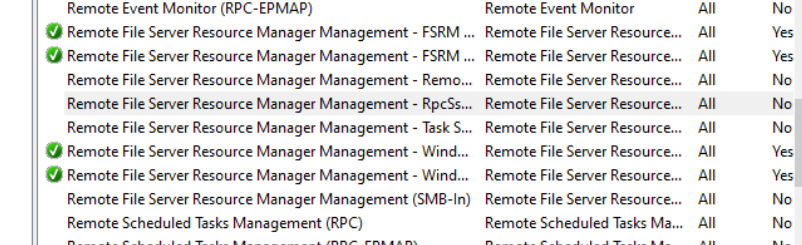
- Here you can see me enabling the firewall rules to allow me to remotely manage the files.
- And now the service on my remote admin computer points to the actual server, so the RSAT works now.
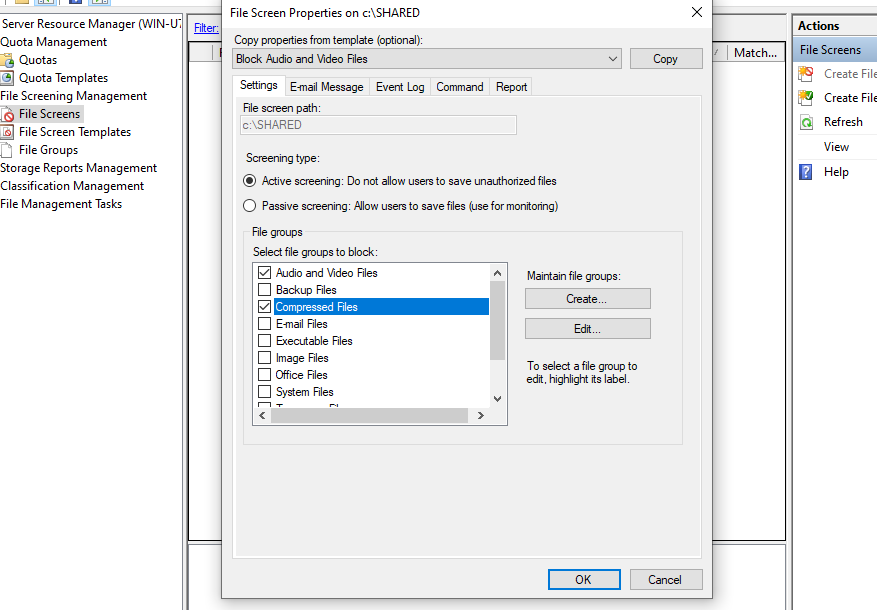
- Using FSRM’s file screening feature to prevent users from uploading audio and video files to this shared folder as these media files can consume massive amounts of storage space.
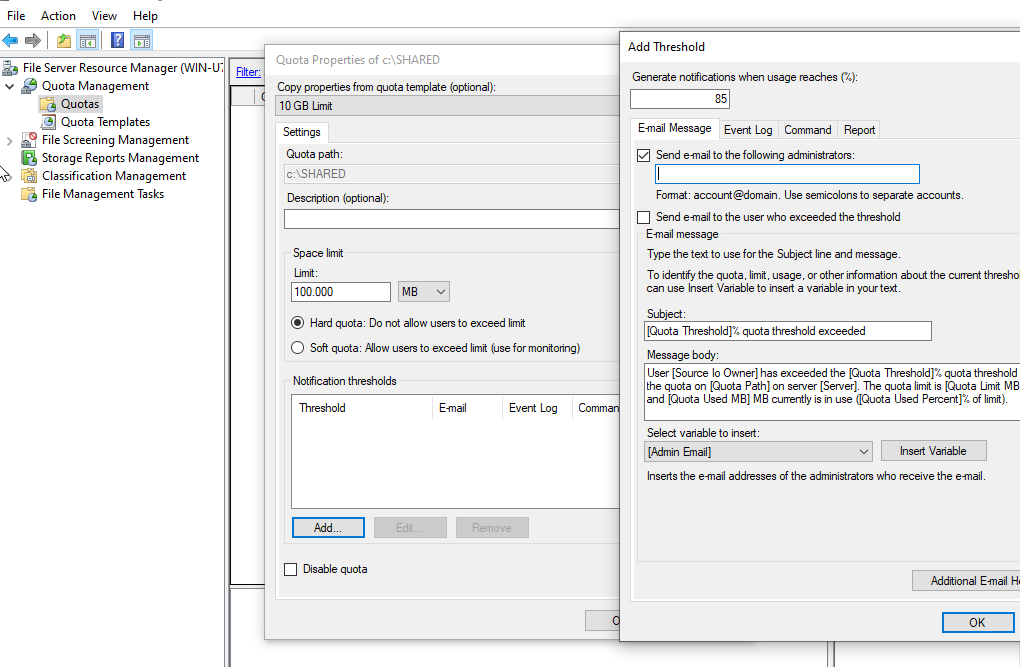
- To prevent this shared folder from consuming all of our server storage, we’re going to implement a 10 GB hard quota. As it is a hard quota, users cannot exceed this limit. Once they reach 10GB, any additional uploads will fail.
- Once a user reaches 85% of their threshold, I will receive an email notifying me of this and I can relay this information to the user(s) for proactive management.
Now let’s explicitly explain the difference between Share permissions and NTFS permissions using a real example:
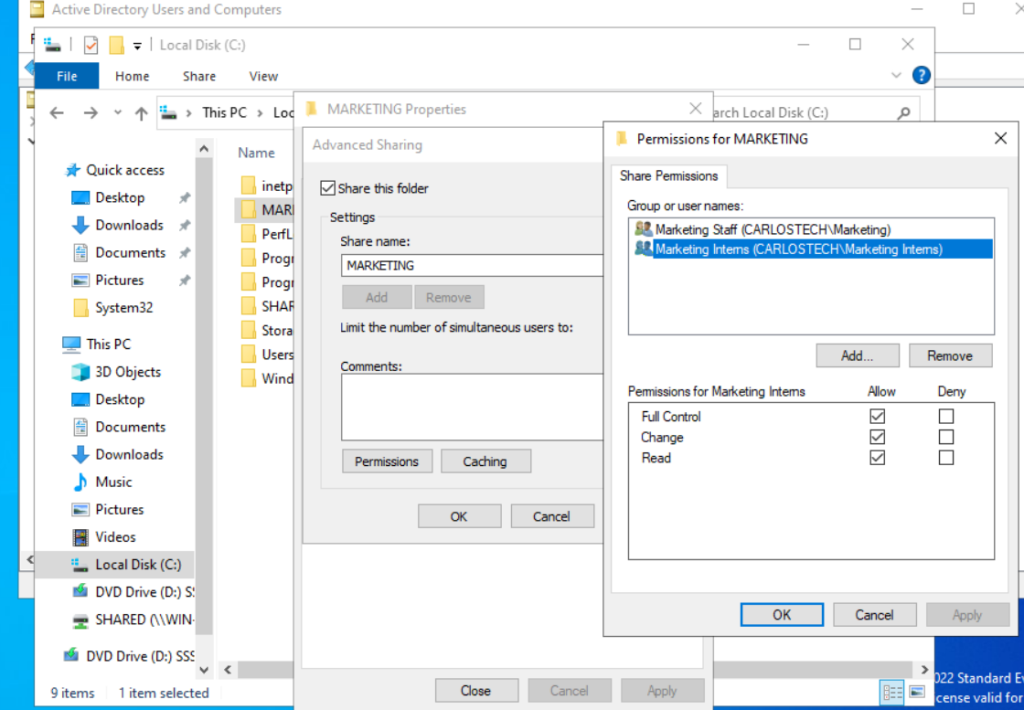
- As you can see in the image above, there’s a folder named “MARKETING.” In the Share permissions, only the Marketing Staff and Marketing Interns groups are listed – no other departments have access.
- The Marketing Interns group also have Full Control at the Share permissions level.
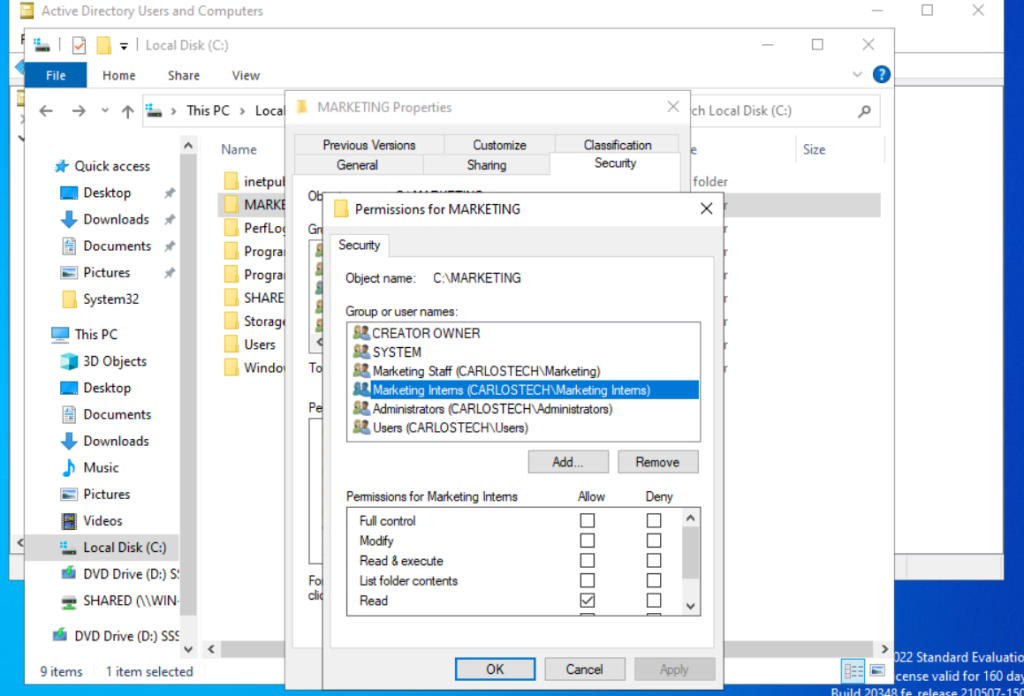
However, in the NTFS permissions, the Marketing Interns only have “Read” rights. So which permission actually applies?
- The more restrictive policy always applies! It does not matter whether the restriction comes from Share permissions or NTFS permissions – when a user accesses a folder over the network, both sets of permissions are evaluated, and the most restrictive one is enforced.
- If the folder is accessed locally, only the NTFS permissions are evaluated.
- NTFS provides much more granular control versus Share permissions and because of this, IT admins may give users full “share” permissions but actually configure the specific permissions within NTFS so the users’ permissions are not controlled by a broad scope share permission.
- You do not want to give read and execute rights in NTFS and only read rights in share permissions, as then that “user/group” will only have read rights.
Summary of Cross-Domain Permissions:
✅ Global Groups: Can be used for permissions in other domains
❌ Domain Local Groups: Cannot be used for permissions in other domains
✅ Universal Groups: Can be used for permissions in any domain (easiest for multi-domain)
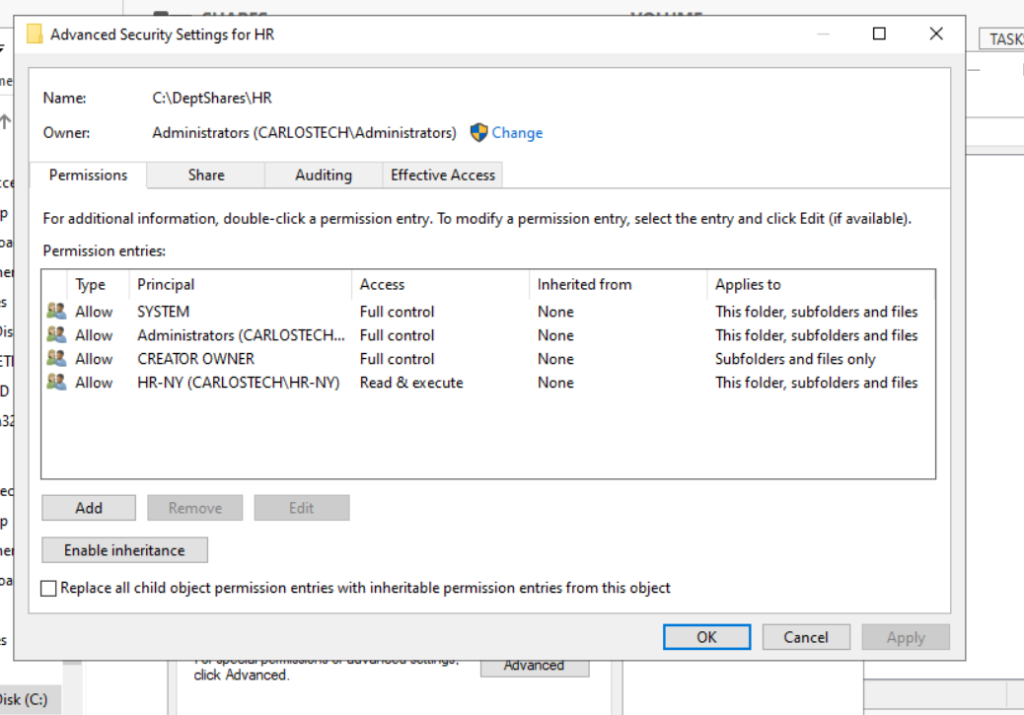
Inheritance
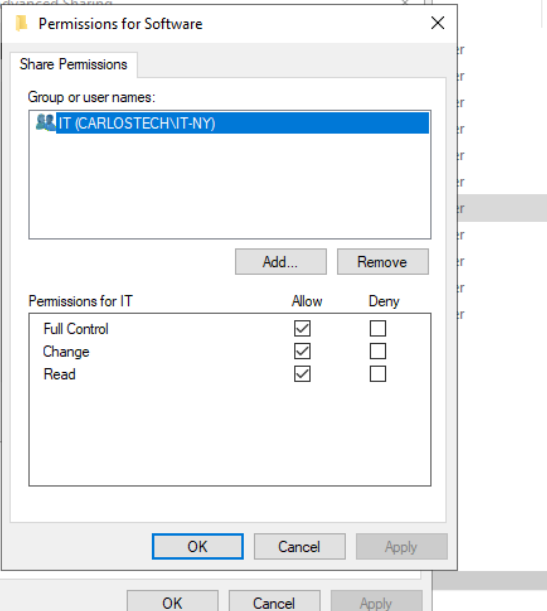
We have a folder named “Software” for our IT Department on our server. The entire IT Department should have access and read/write permissions on this folder. However, there is a subfolder named “Licenses” that only the IT Managers should have access to.
- The dilemma: Every subfolder within a parent folder has inheritance enabled. This means that whatever permissions a user or group has on the parent folder will automatically apply to all subfolders and files within it.
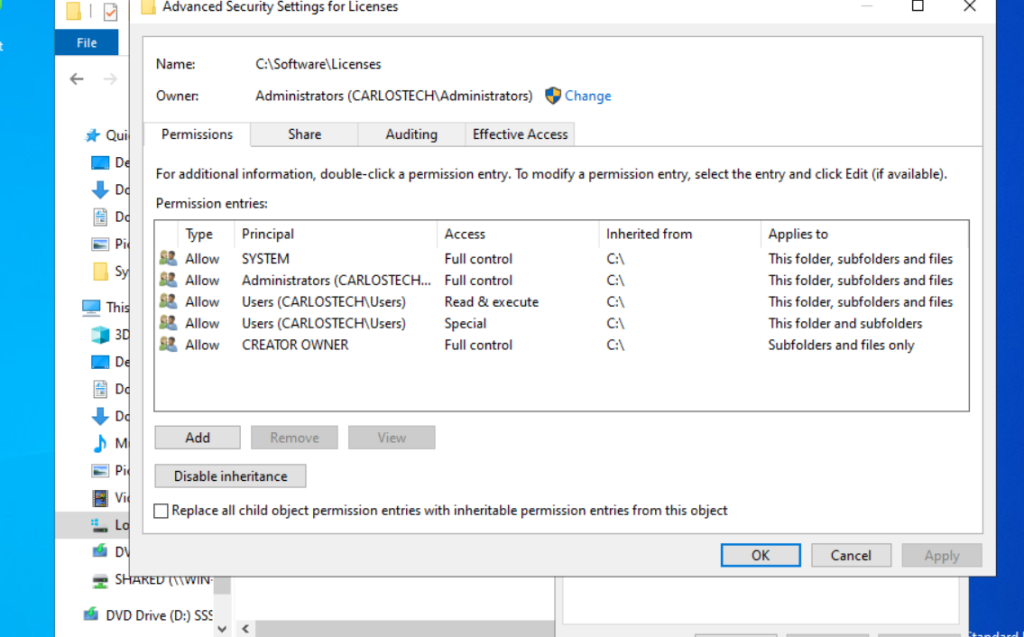
- Look at the subfolder “Licenses” in the image above. Every group has at least read & execute privileges. We need to click on the disable inheritance button – and it will give you two options.

- We chose the “Remove all inherited permissions” option to have a clean slate for this subfolder as evident in the image above.
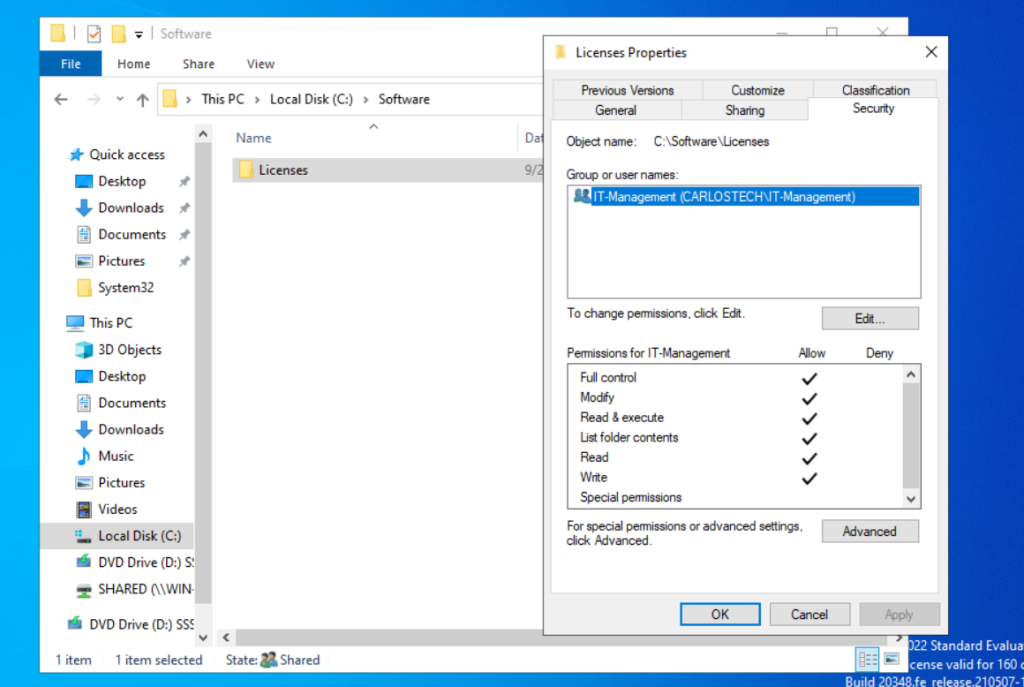
- We added the IT-Management group for the Licenses subfolder with full permissions for them. Now they’re the only group or users who have access to this subfolder.
- It is best practice to include “SYSTEM” and at least “ADMINISTRATORS” to the allowed groups to reduce the possibility of system malfunctions and to have a back up group for access.

- Remember our Marketing folder that only the marketing department and its interns were able to access? Well, I tried to access it with Peter, a user in the IT group, to demonstrate this:
- Peter is completely unable to access the Marketing folder.
One last scenario to showcase how “deny” permissions always trump “allow”:
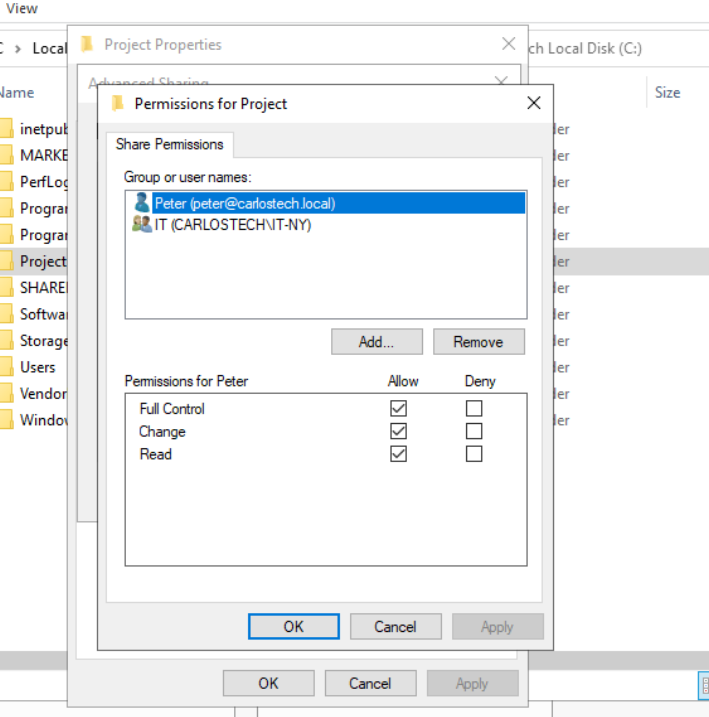
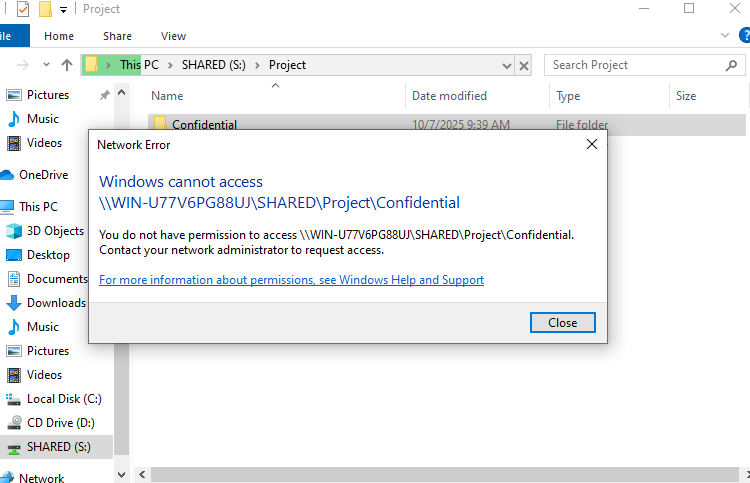
- We have a folder named “Project” that the IT department will use. The folder is shared to everyone in the IT department and I included Peter separately to demonstrate the “deny” permission. Peter is also part of the IT department (from our previous AD project).
- Peter has access to the Project folder, as evident in the image above. However, Peter is new to the company and currently should not have access to the “Confidential” folder.
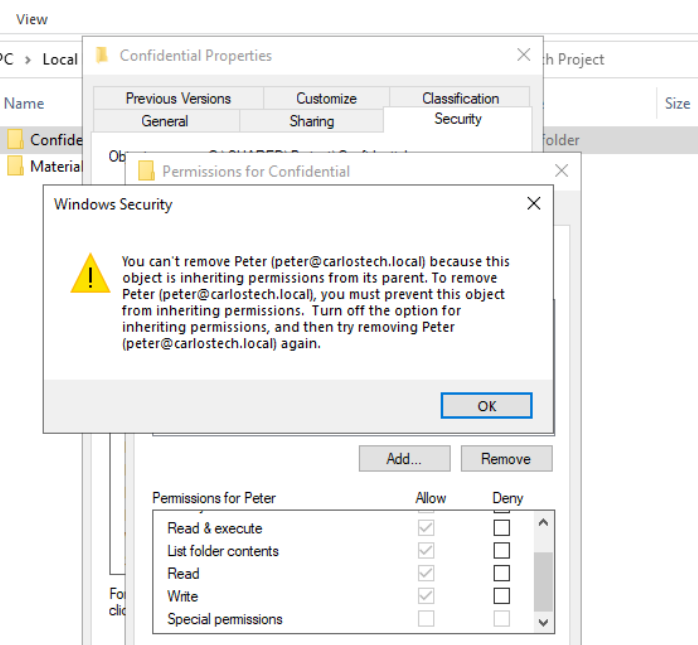
- I tried to delete Peter himself from the folder’s NTFS permissions but was denied as a result of inheritance.

- As you can see, the “allow” permissions are grayed out and are not available to edit due to the inheritance we discussed earlier. Peter can open this folder as of right now.
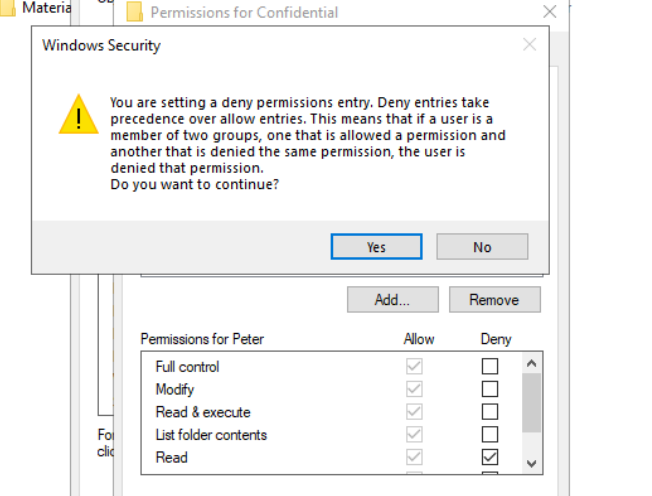
- We’re applying a deny permission to prevent Peter from reading the contents of this folder. Since a deny permission always overrides an allow permission, Peter will not be able to read the folder’s contents and as such, Peter automatically cannot perform any higher-level actions either (such as modify and execute).
- Denying at the Read level blocks everything above it as well.
- And now Peter has no access to the Confidential folder even though he has “allow” permissions that were enabled through inheritance from the parent folder.
Access-Based Enumeration
Remember earlier how the Marketing folder’s shared permissions only had the Marketing department and its interns, yet Peter, in the IT group, was able to find it?
- Well, we can configure folder permissions so that if a user or group doesn’t have access to a folder, that folder won’t even appear when they browse the share. It’s completely invisible to them.
Why this is valuable:
- Reduces helpdesk tickets – Users don’t see folders they can’t access, so they don’t ask “why can’t I open this?”
- Improves security – Users can’t even attempt to access folders they shouldn’t know about.
- Cleaner experience – Users only see what’s relevant to them, making shared drives less cluttered and confusing.
Our scenario:
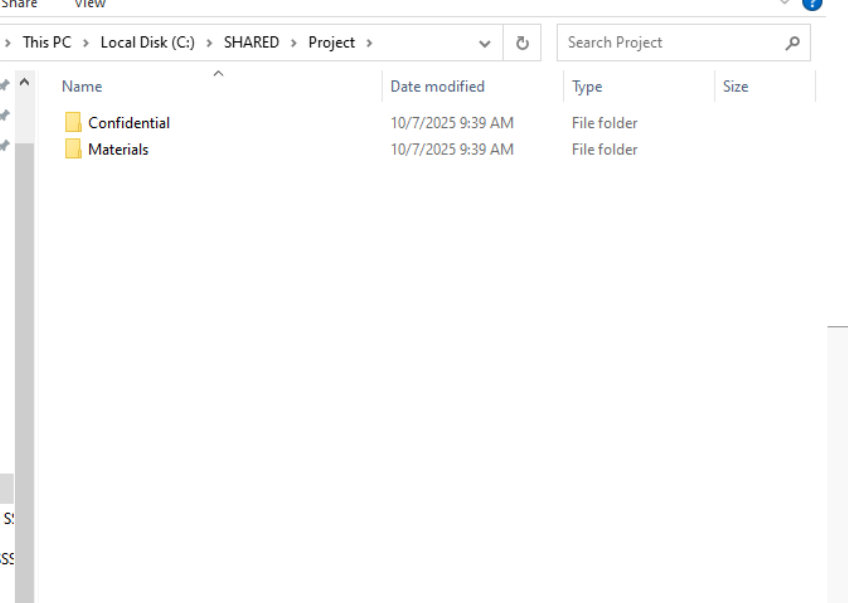
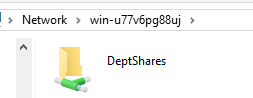
- We have a shared folder called “Shared” with two subfolders inside:
- HR subfolder – for Human Resources documents.
- IT subfolder – for IT department files.
- We want users from the IT security group to only be able to see the IT folder and users from the HR group to only be able to see the HR folder. Each department should not even know the other folder exists.
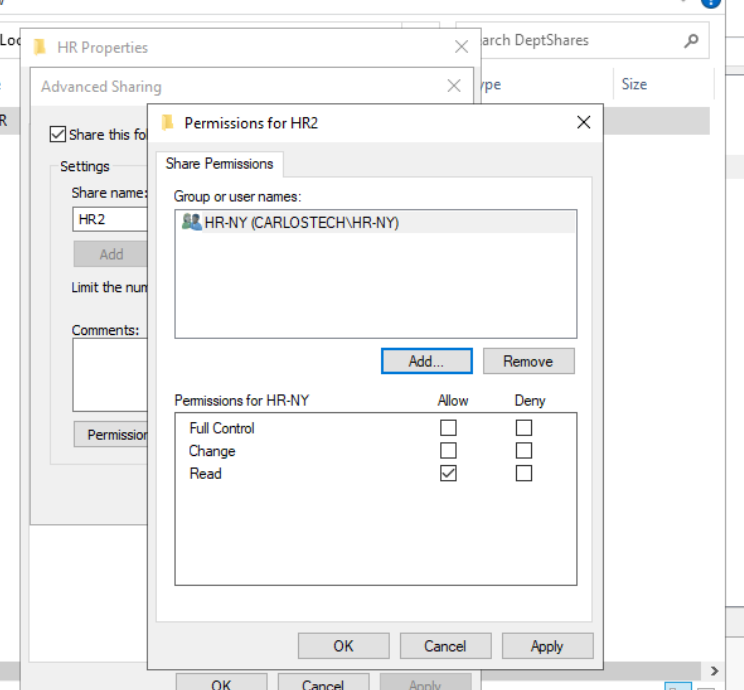
- Only sharing the HR-subfolder to the HR group with read rights.
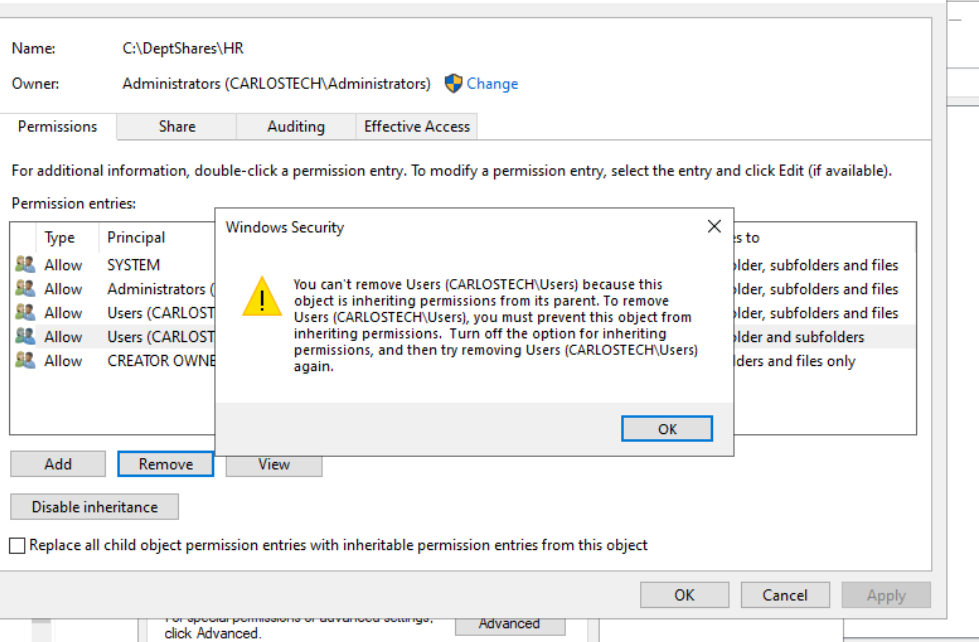
- Not letting me remove regular Users from this HR subfolder in NTFS due to inheritance. We are going to disable inheritance but this time – we are going to convert inherited permissions into explicit permissions as we do not want to have a clean slate.
- Now IT should not have access to this folder whatsoever.
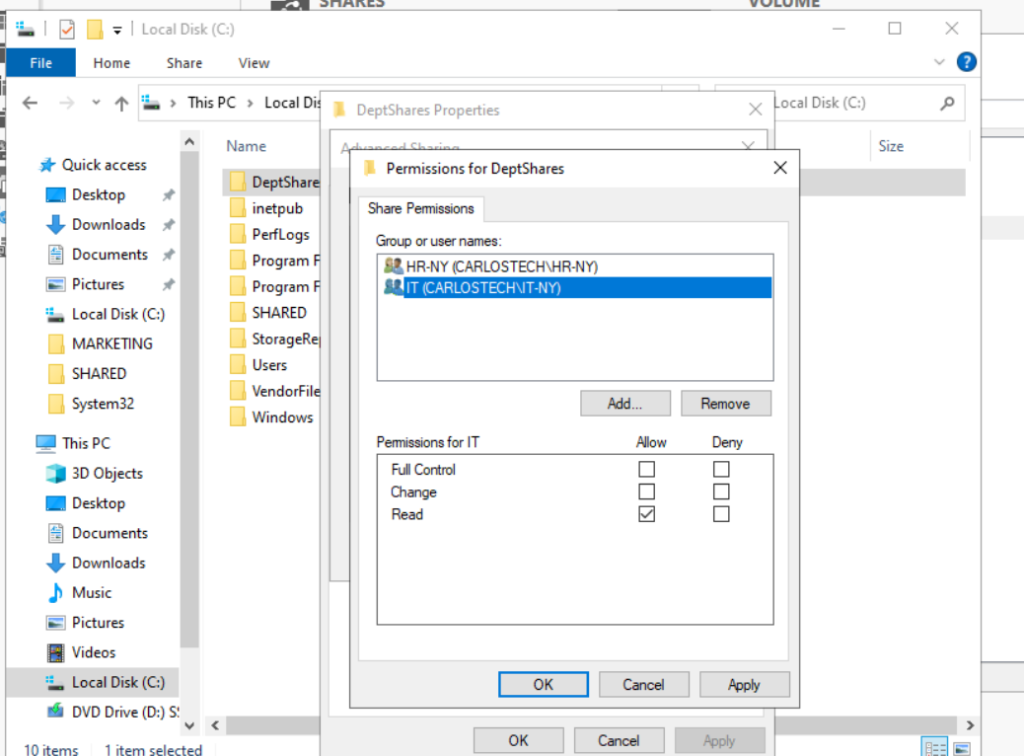
- Configured the share permissions on the parent folder, ‘DeptShares‘ so it is only shared to the HR and IT departments with read rights only.
Correct permissions are applied so now we activate Access-Based Enumeration, which completely hides folders from users who shouldn’t be seeing it in the first place.
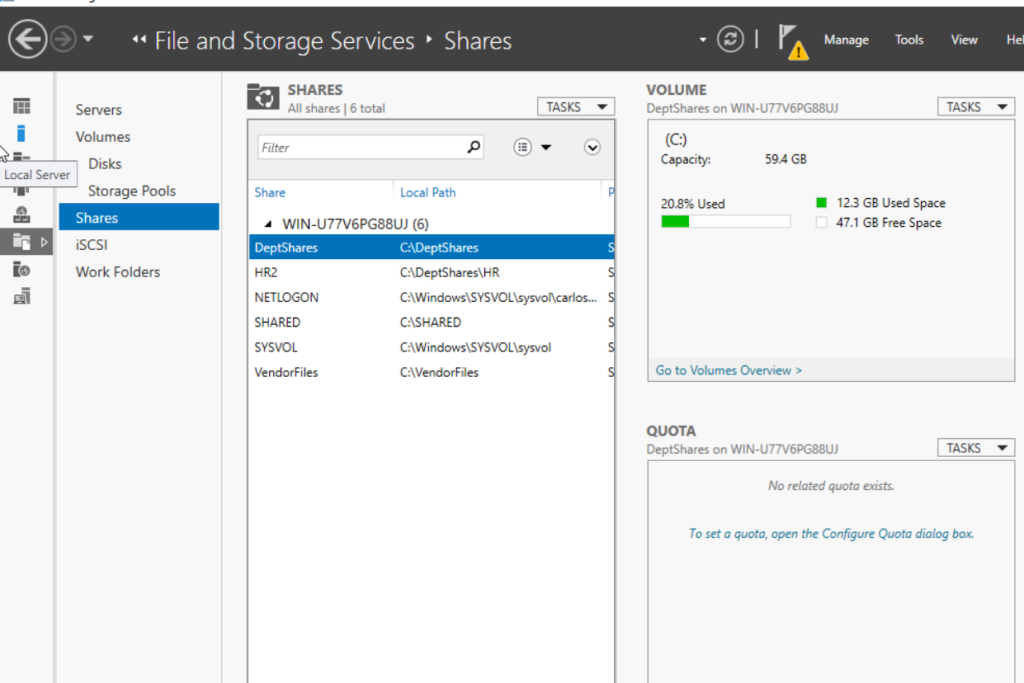
- Within Server Manager, go to File and Storage Services -> Shares, right click -> Properties and finally Settings on the folder you want to activate ABE on.
- Ensure that this is the parent folder that contains the subfolders you want to hide.
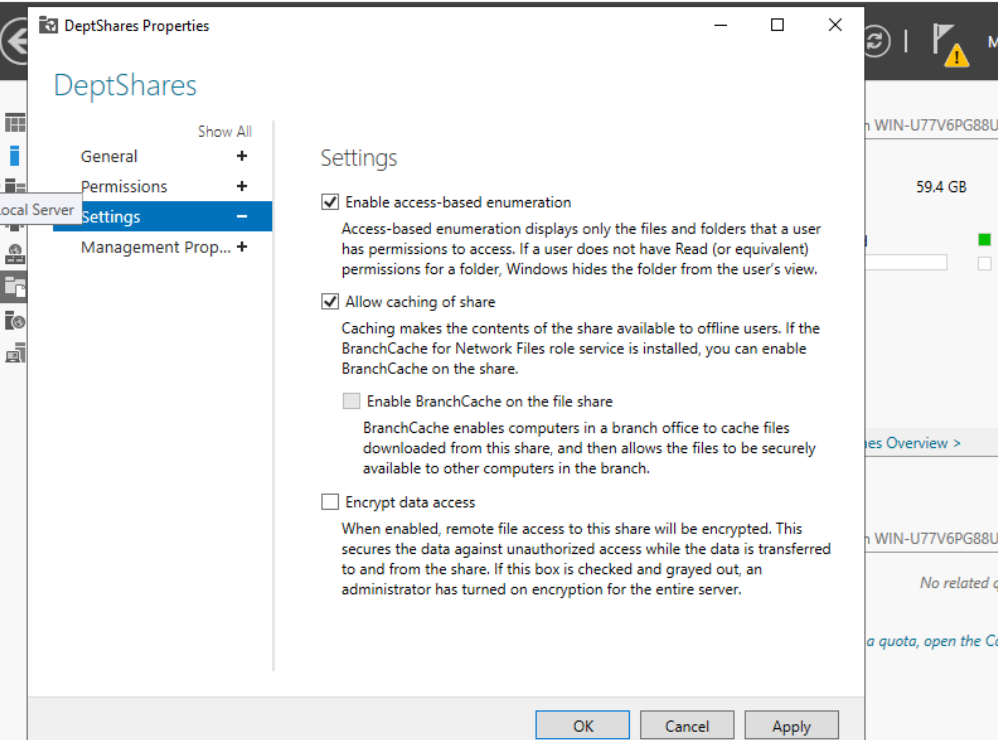
- Now ABE is activated for this share. When Peter (who is in the IT group) opens the “DeptShares” folder, he will not even know the existence of the HR folder.
- The folder is properly shared with Peter.
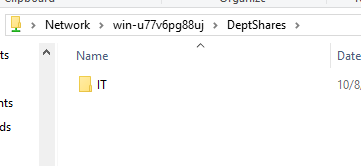
- Peter is unable to see the HR folder – he doesn’t even know it exists.
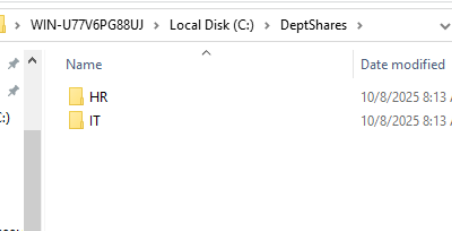
- Yet, it’s clearly here locally on the server.
Access-Based Enumeration successfully accomplished!
Now we are going back to a GPO we previously configured on a prior project to see if they apply to Peter.
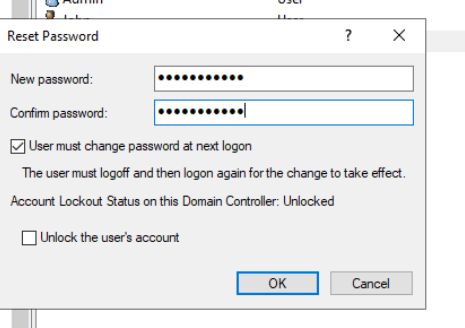
- We are going to reset Peter’s password and force him to change it when he logs on again through Active Directory’s Users and Accounts.
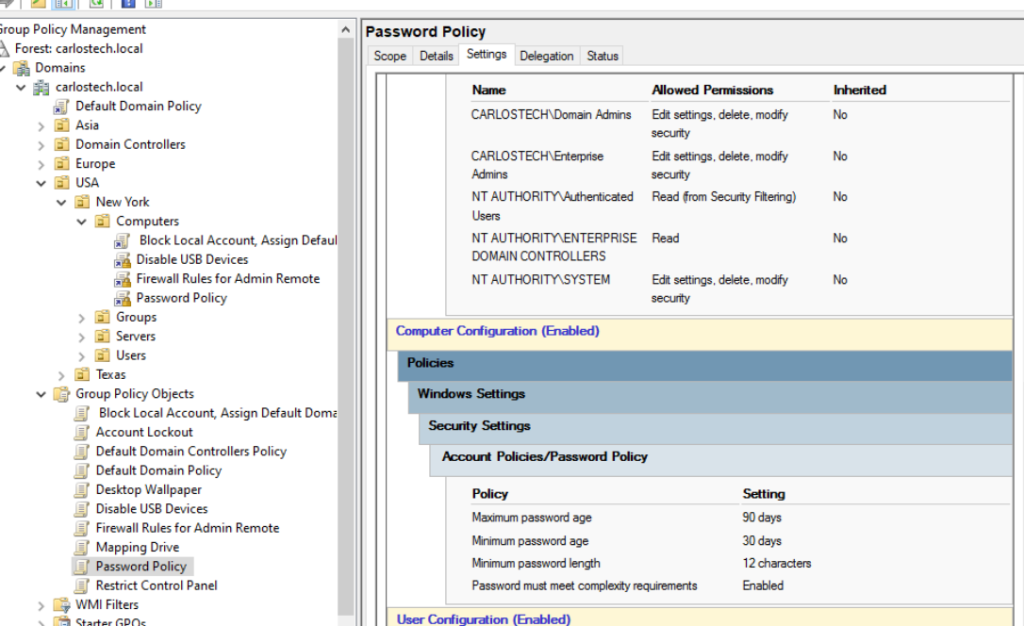
- Recall our password policy GPO we applied to all computers.
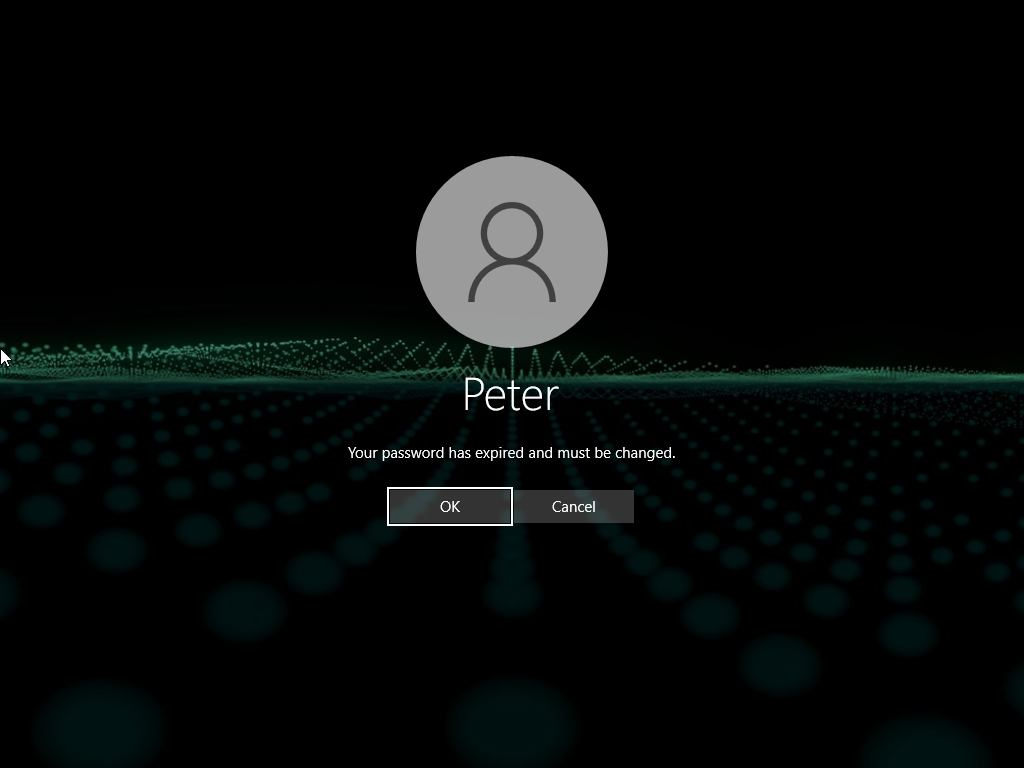
- Forcing us to change the password.
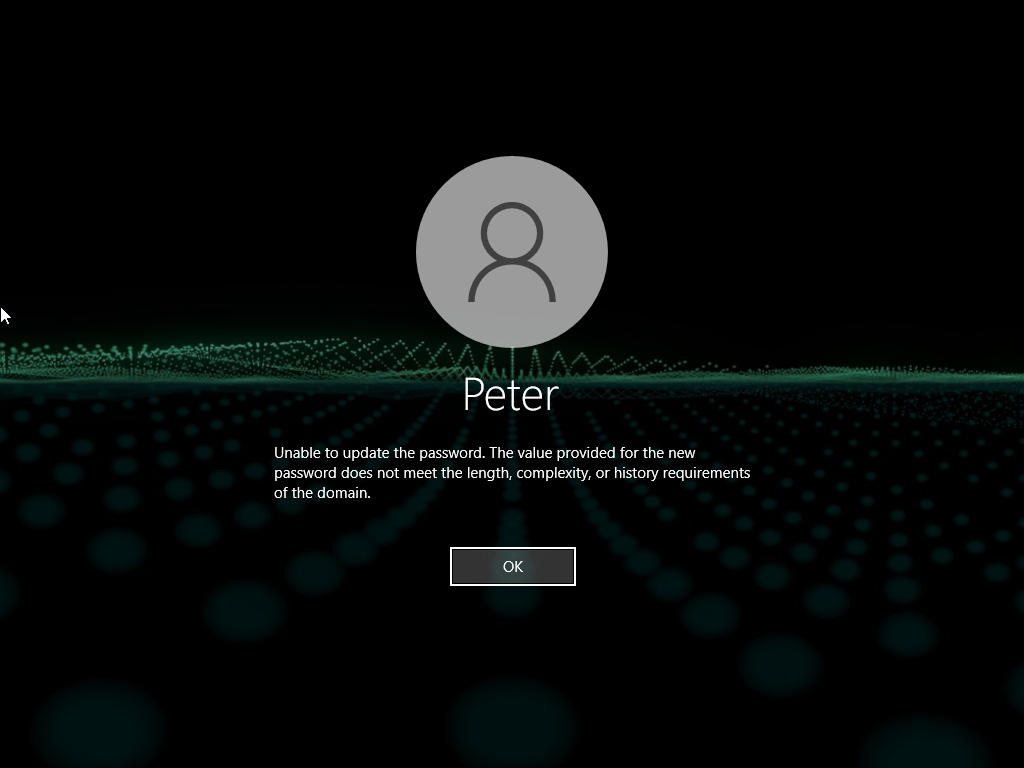
- And it works!
Implementing Service Accounts

- First step is creating a ‘user’ account in the ‘Servers’ OU.
- Used the ‘$’ symbol as the prefix to the username to indicate it is a service account and not a real user.

- Fill in whatever details you may need to.

- On the target machine, we’re going to download the “Sysinternals Suite” – this provides a large array of different tools that we can implement.
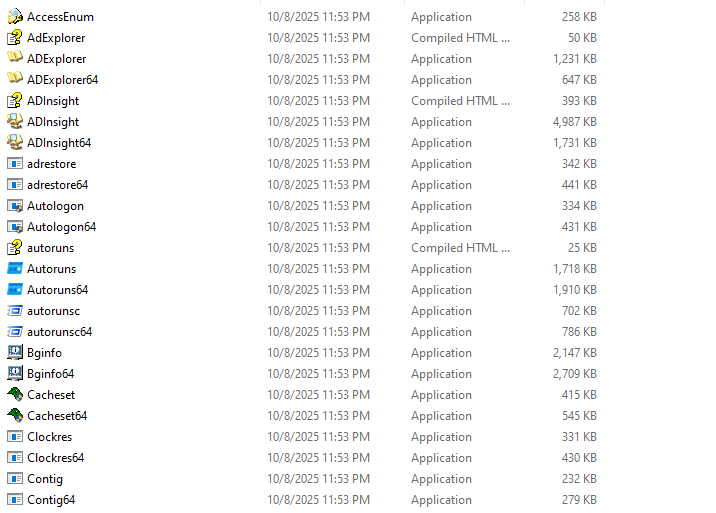
- Some of the many different kinds of services present in this suite.
- We’re going to use Autologon64 as we want this machine to always automatically log on to the same account.
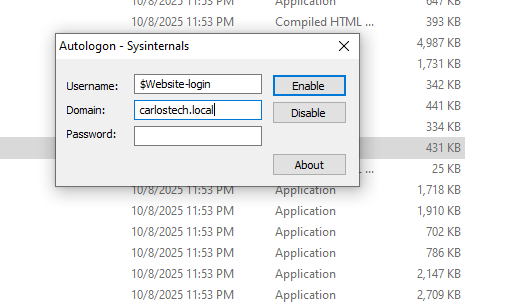
- Put the corresponding information in these fields.

- Restarting the machine to see if it applied.
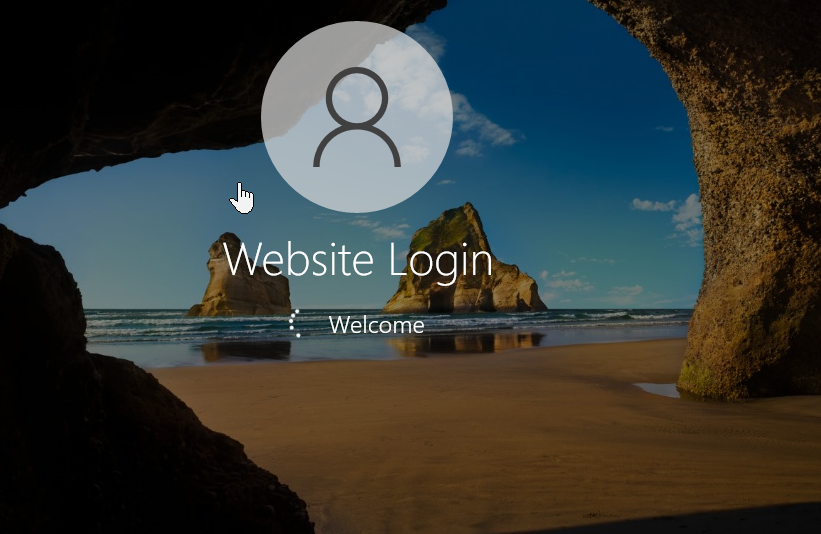
- And it did! Without me having to type in anything, it automatically logged into our new service account.
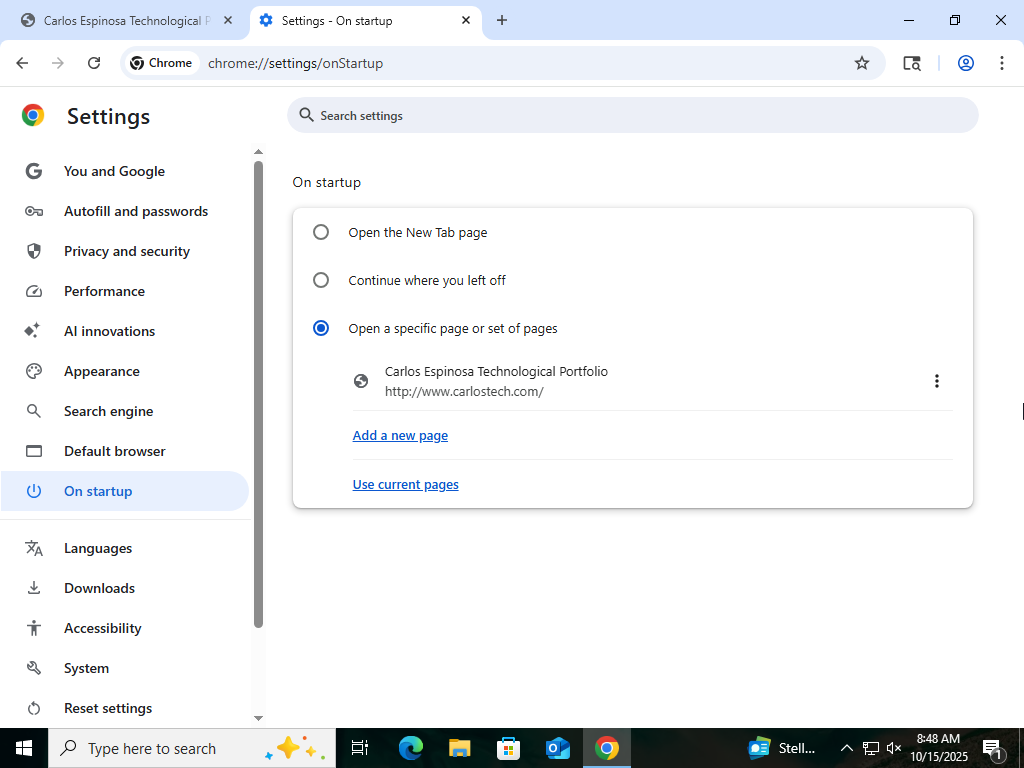
- Now we want this machine to always automatically go to my website on start up.
- The first step in accomplishing this is to configure your default browser to automatically direct you to whatever website you want on browser startup.
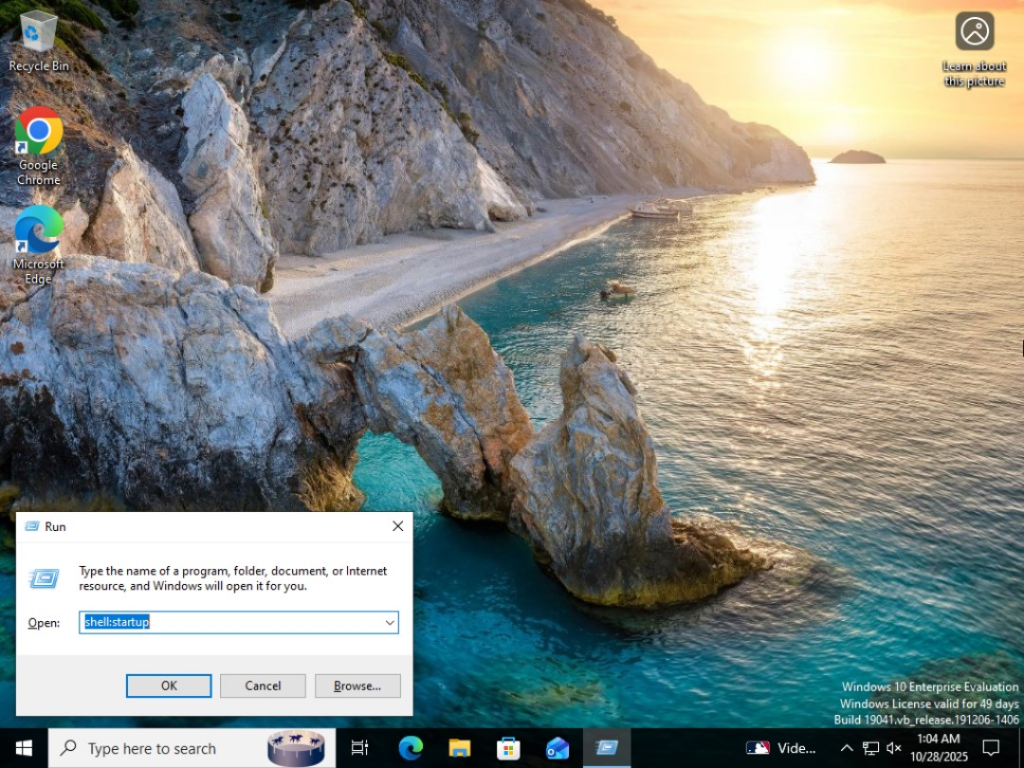
- Pressing ‘windows + R’ and going to shell:startup to ensure Chrome is a startup program.
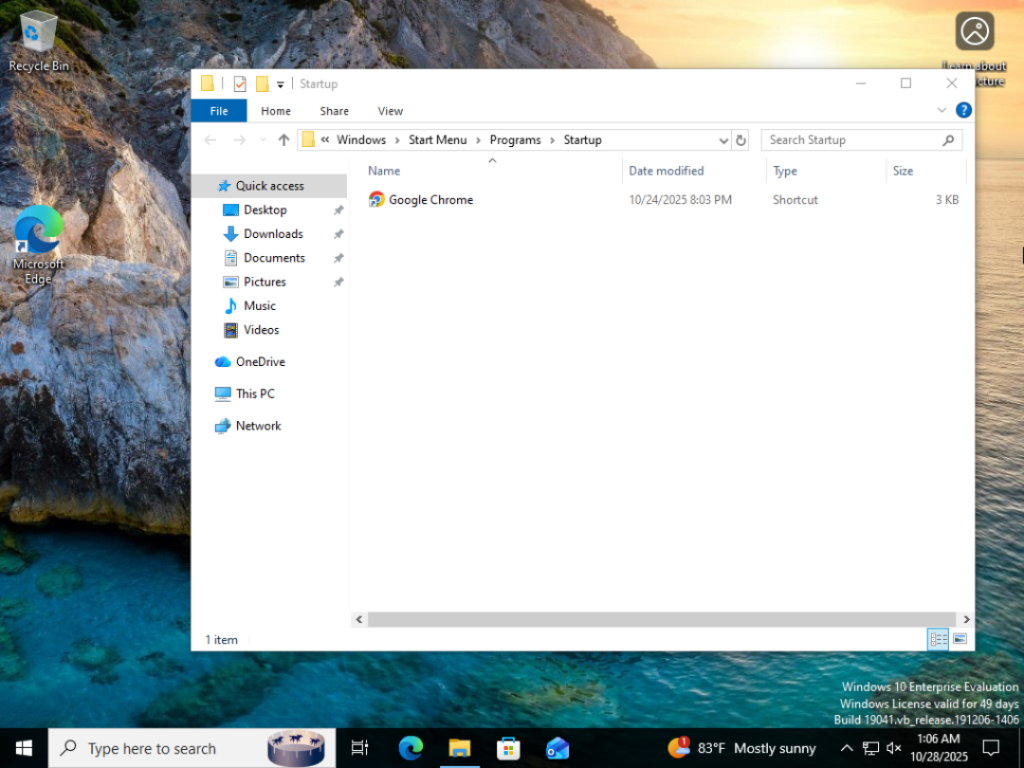
- Dragged Chrome into this folder.
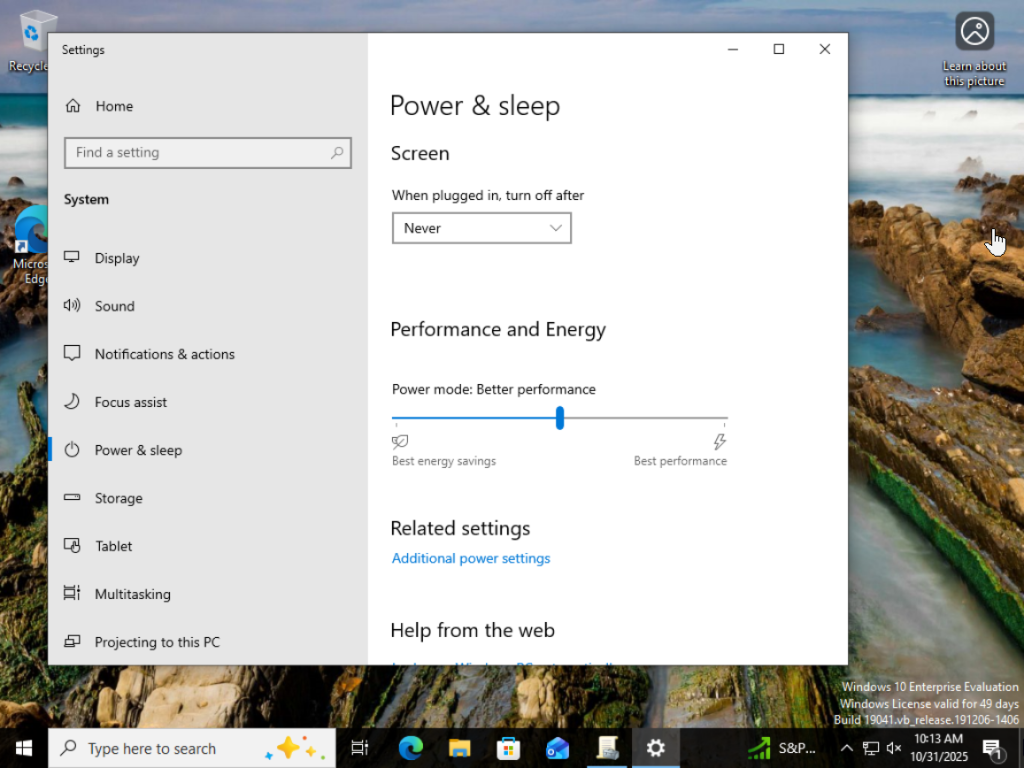
- We want this device to also never sleep.
Finally, we’re going to restrict all other users from being able to login into this machine through a GPO.
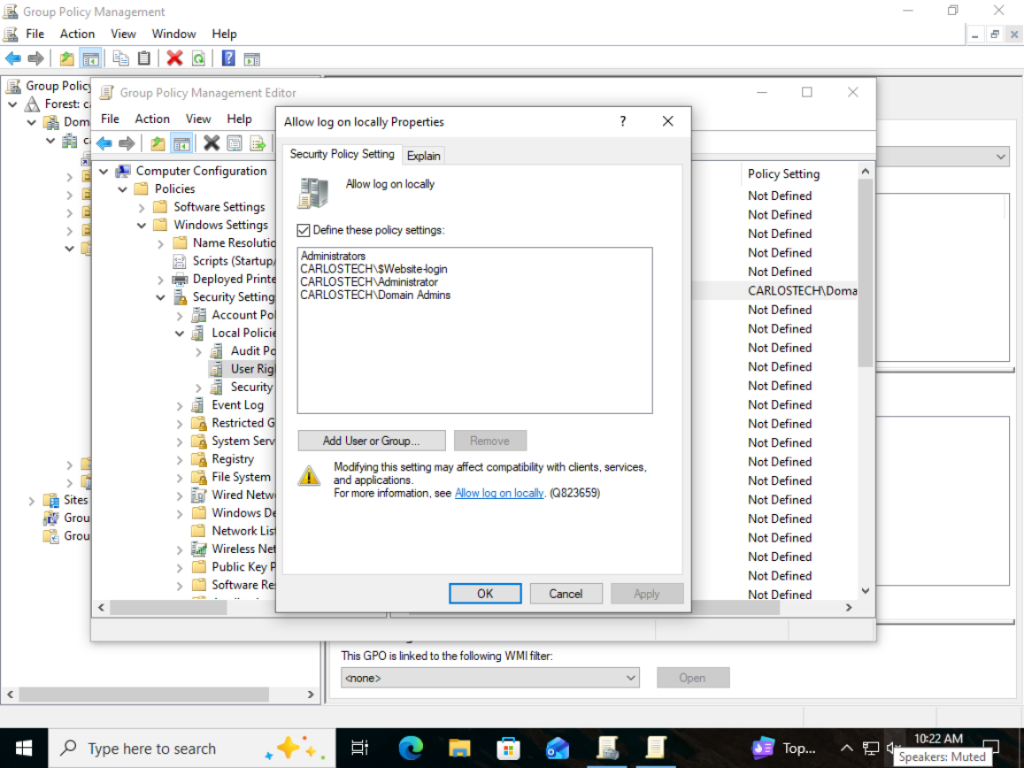
- Create a “allow log on locally” GPO under Computer Configuration -> Windows Settings -> User Rights.
- Using “allow” instead of “deny” so there are no issues.
- Only allow the specific types of accounts able to log into this machine.
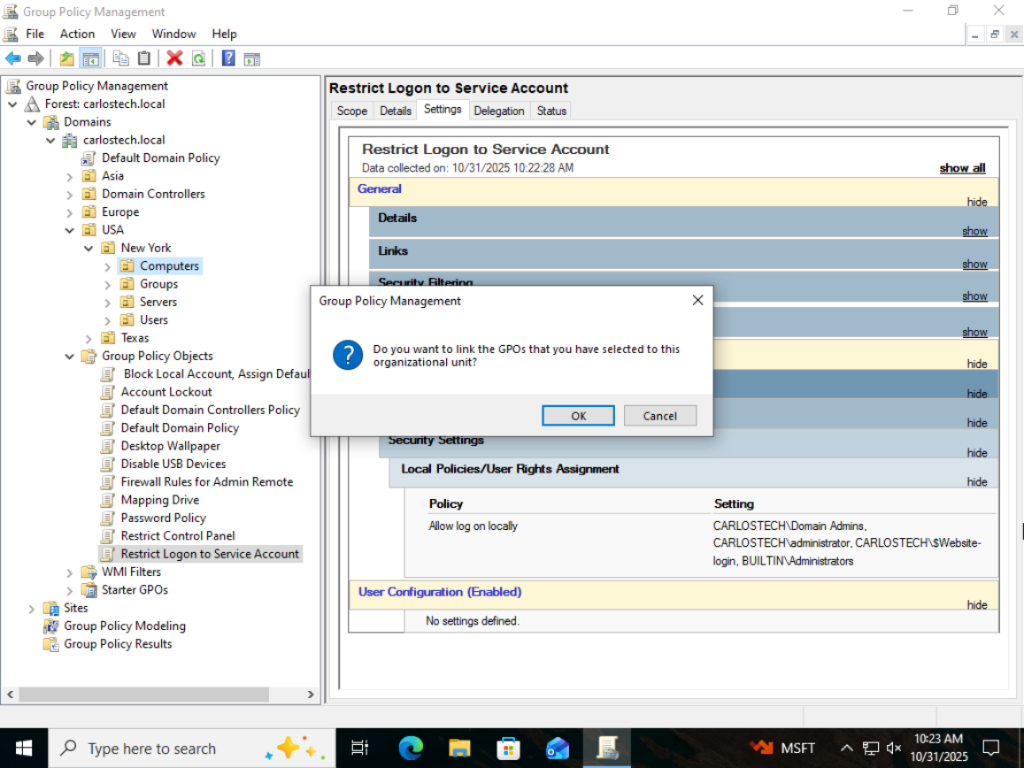
Link the GPO to the actual machine.
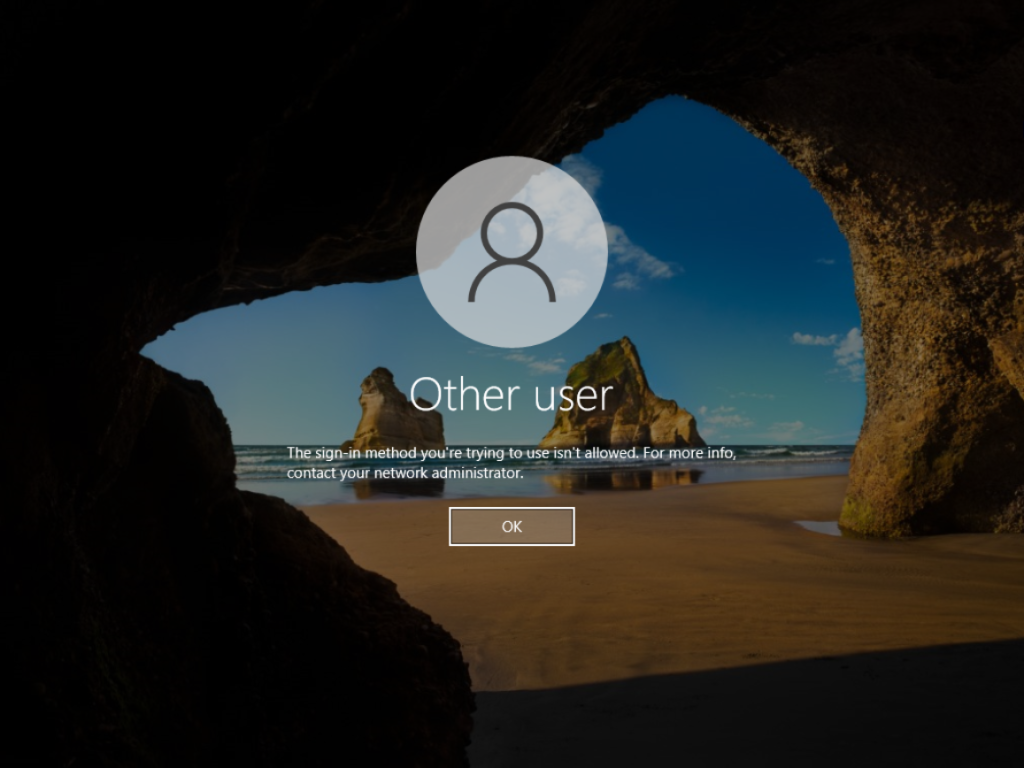
I tried to sign in with Peter’s user account and was denied!